Like many of you, I spend a lot of time using computers: to write, draw, render, make music and program. I understand that most people want a digital appliance to get out of the way and make their lives easier, but I know that there are some who would like to better understand and take control of their device — for reasons of security, curiosity, or the desire for personal customization and hackability.
For a long time, I wanted a portable personal computer which you can…
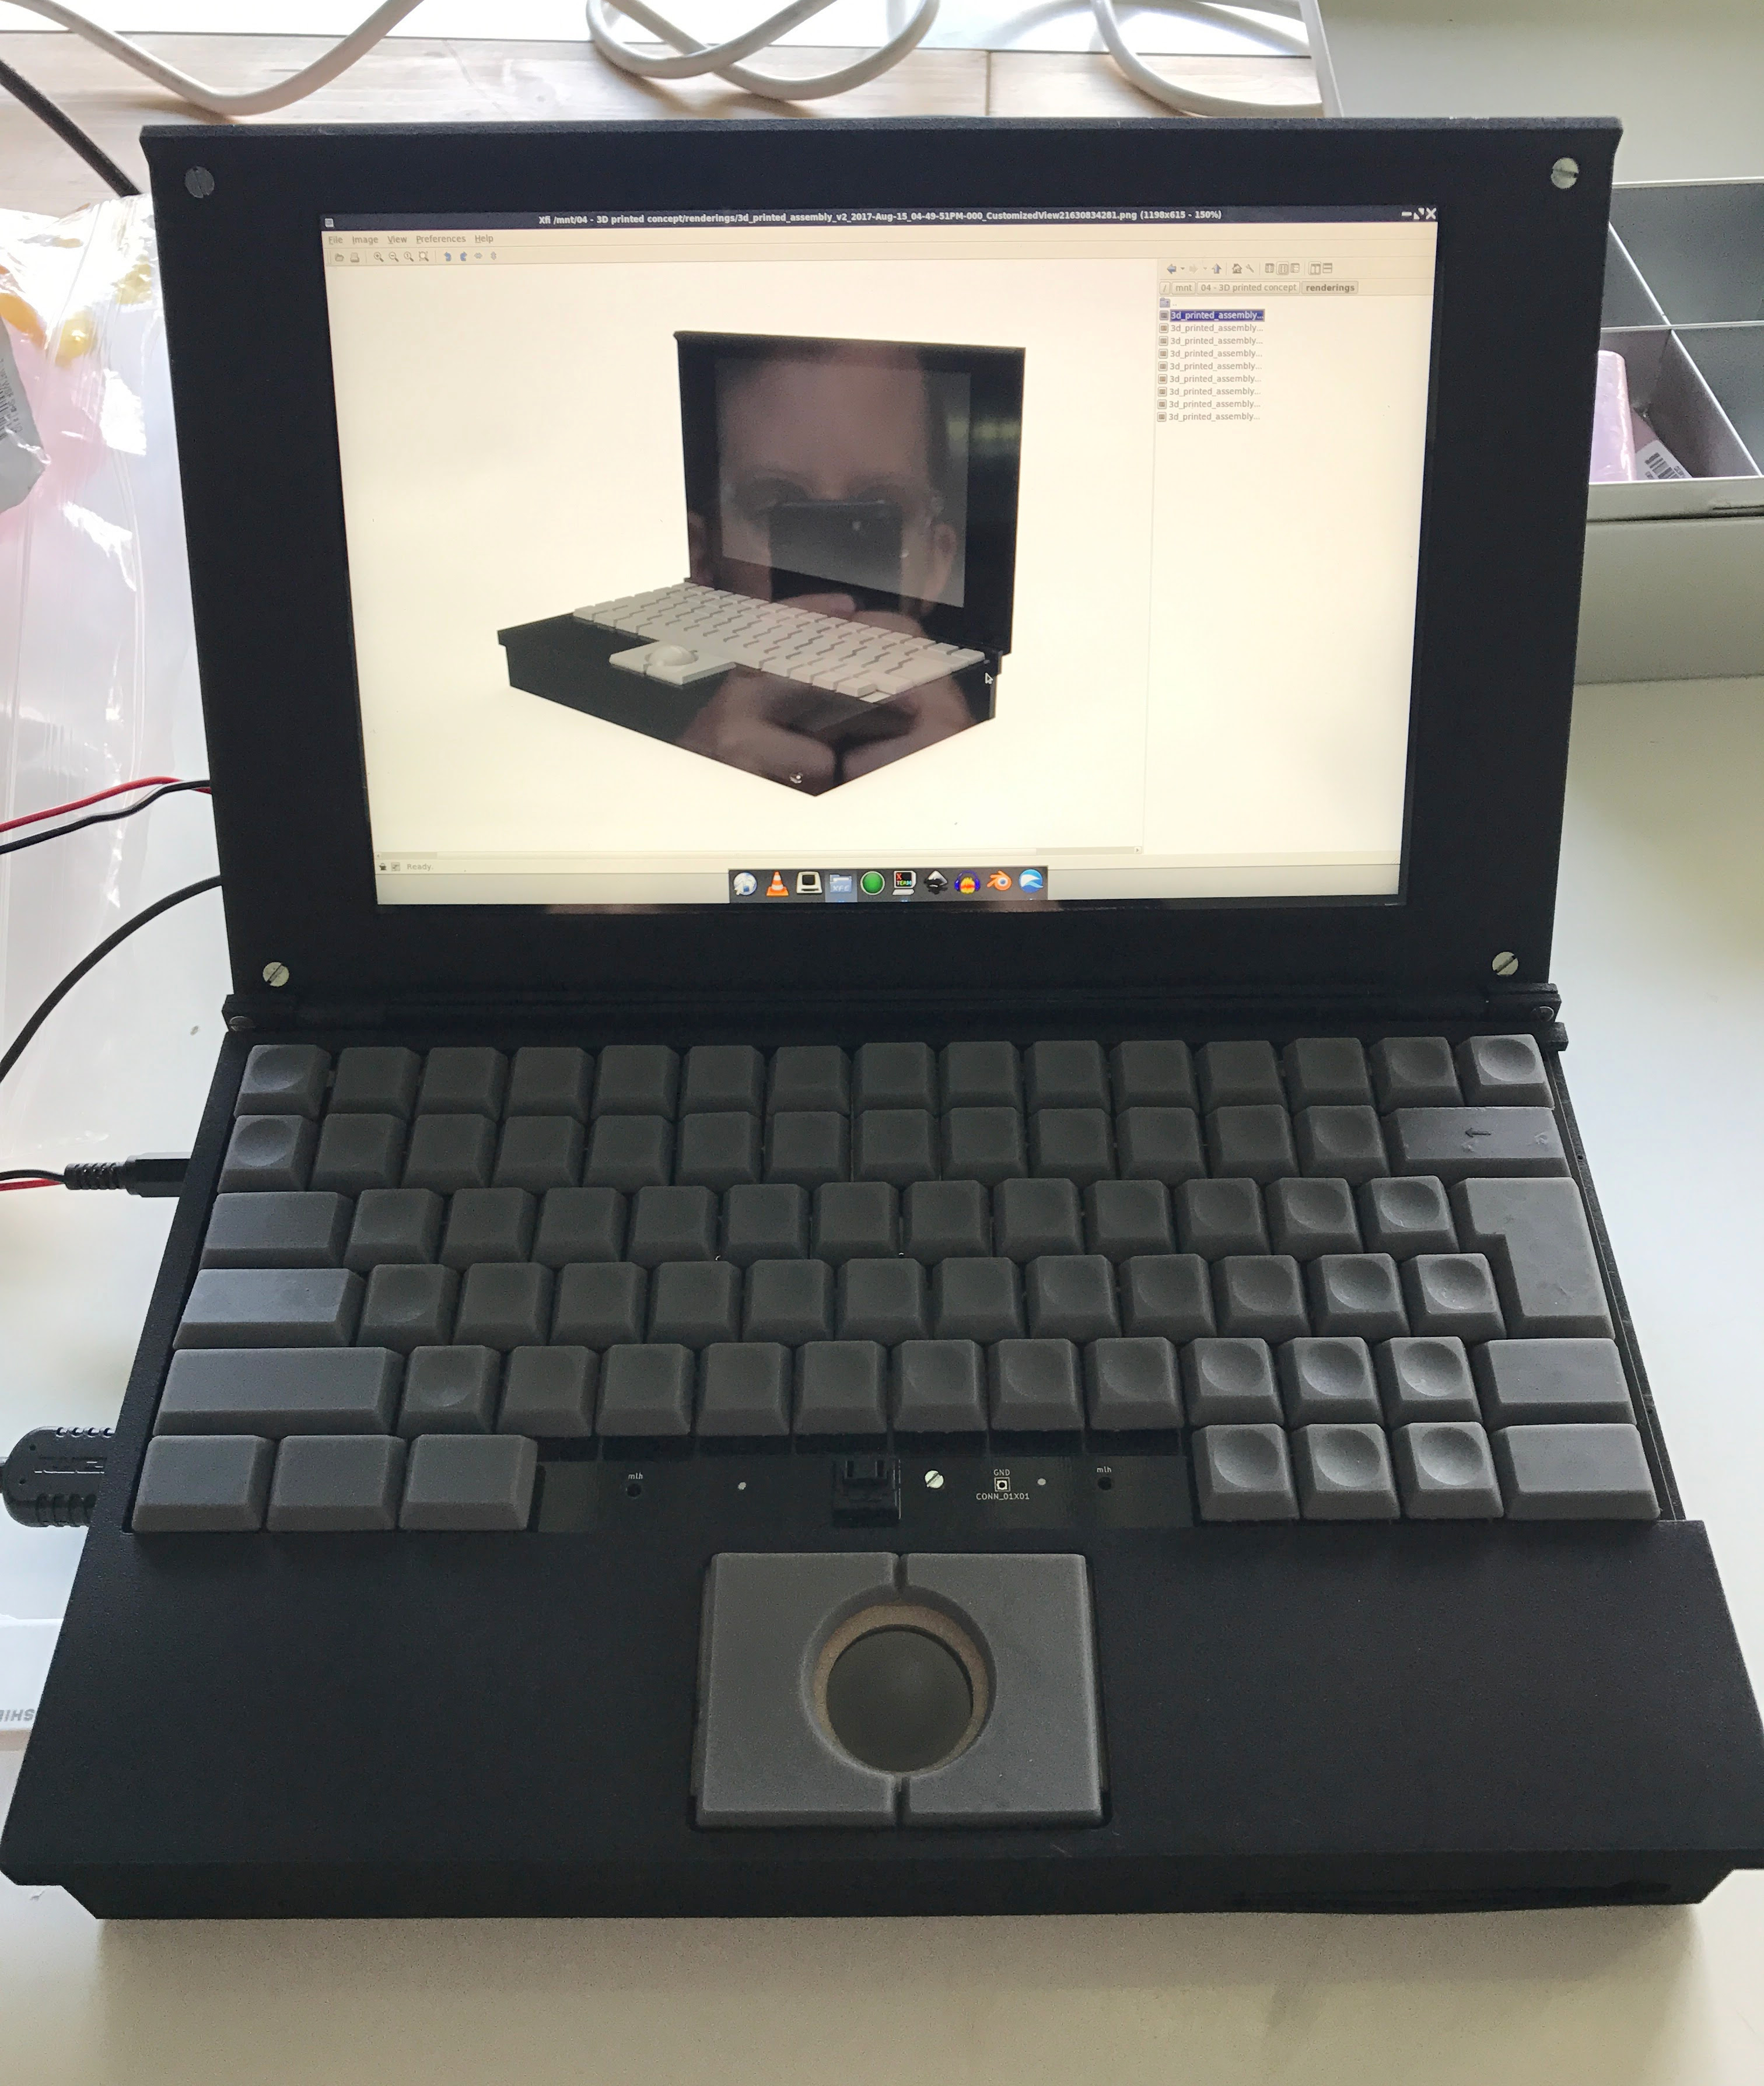
In Summer/Autumn 2017 I teamed up with industrial designer Ana Dantas to make this machine happen. Three months later, I can type this article on the first prototype of Reform, our DIY portable computer.

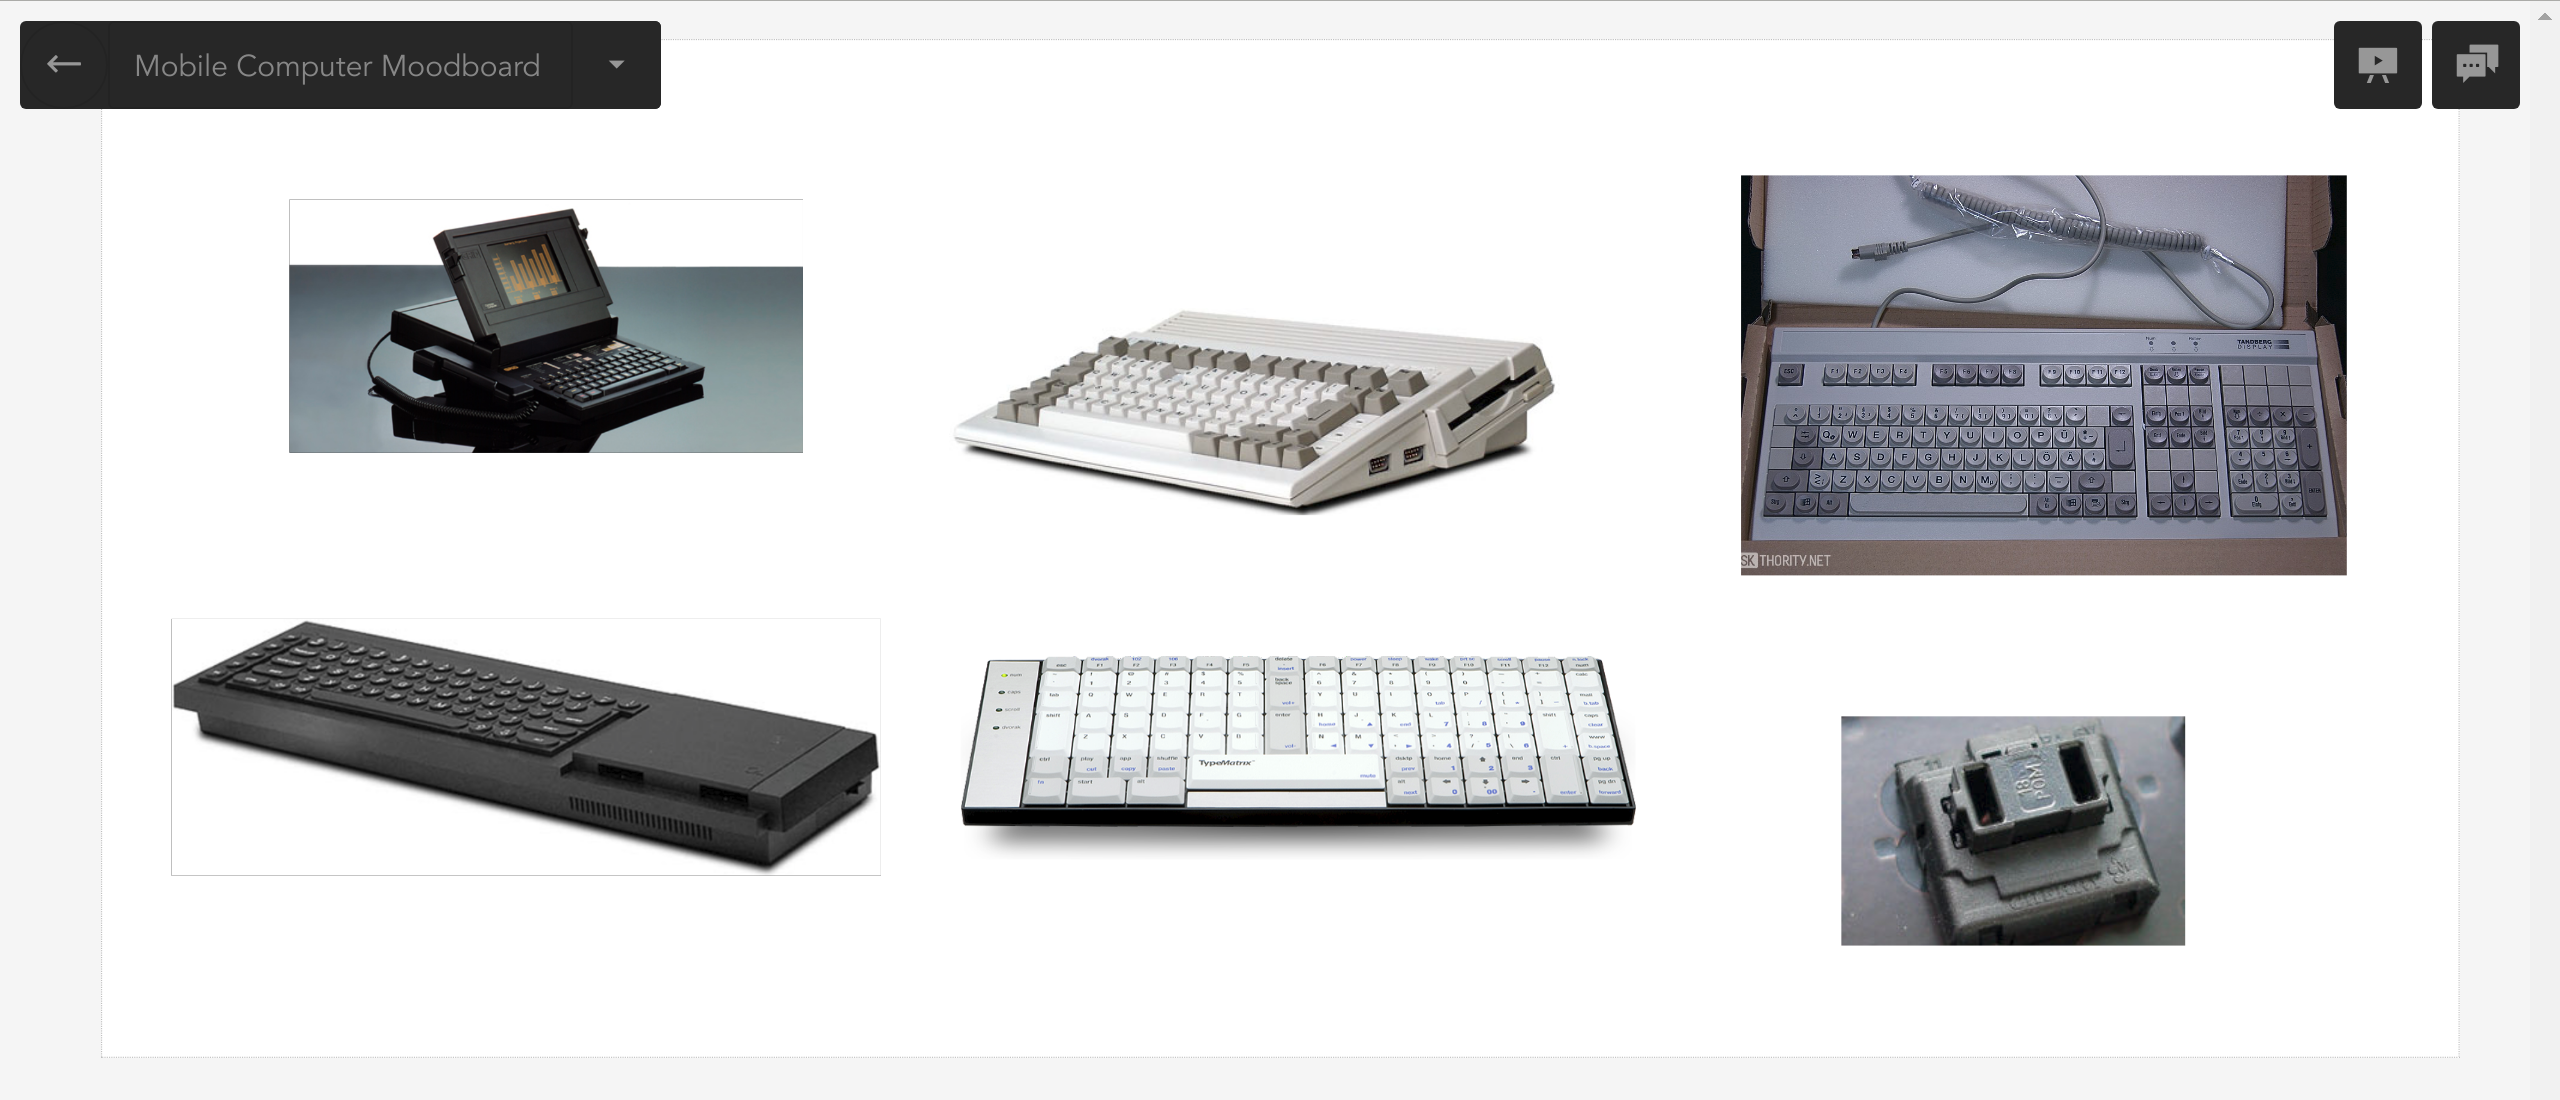
I grew up with home computers like the Sinclair ZX Spectrum, Commodore 64 and Amiga 500. These were quirky and limited in their capabilities, but they had a lot of character and invited to experiment and take apart. It was normal to find complete schematics and programming tutorials in their user manuals.
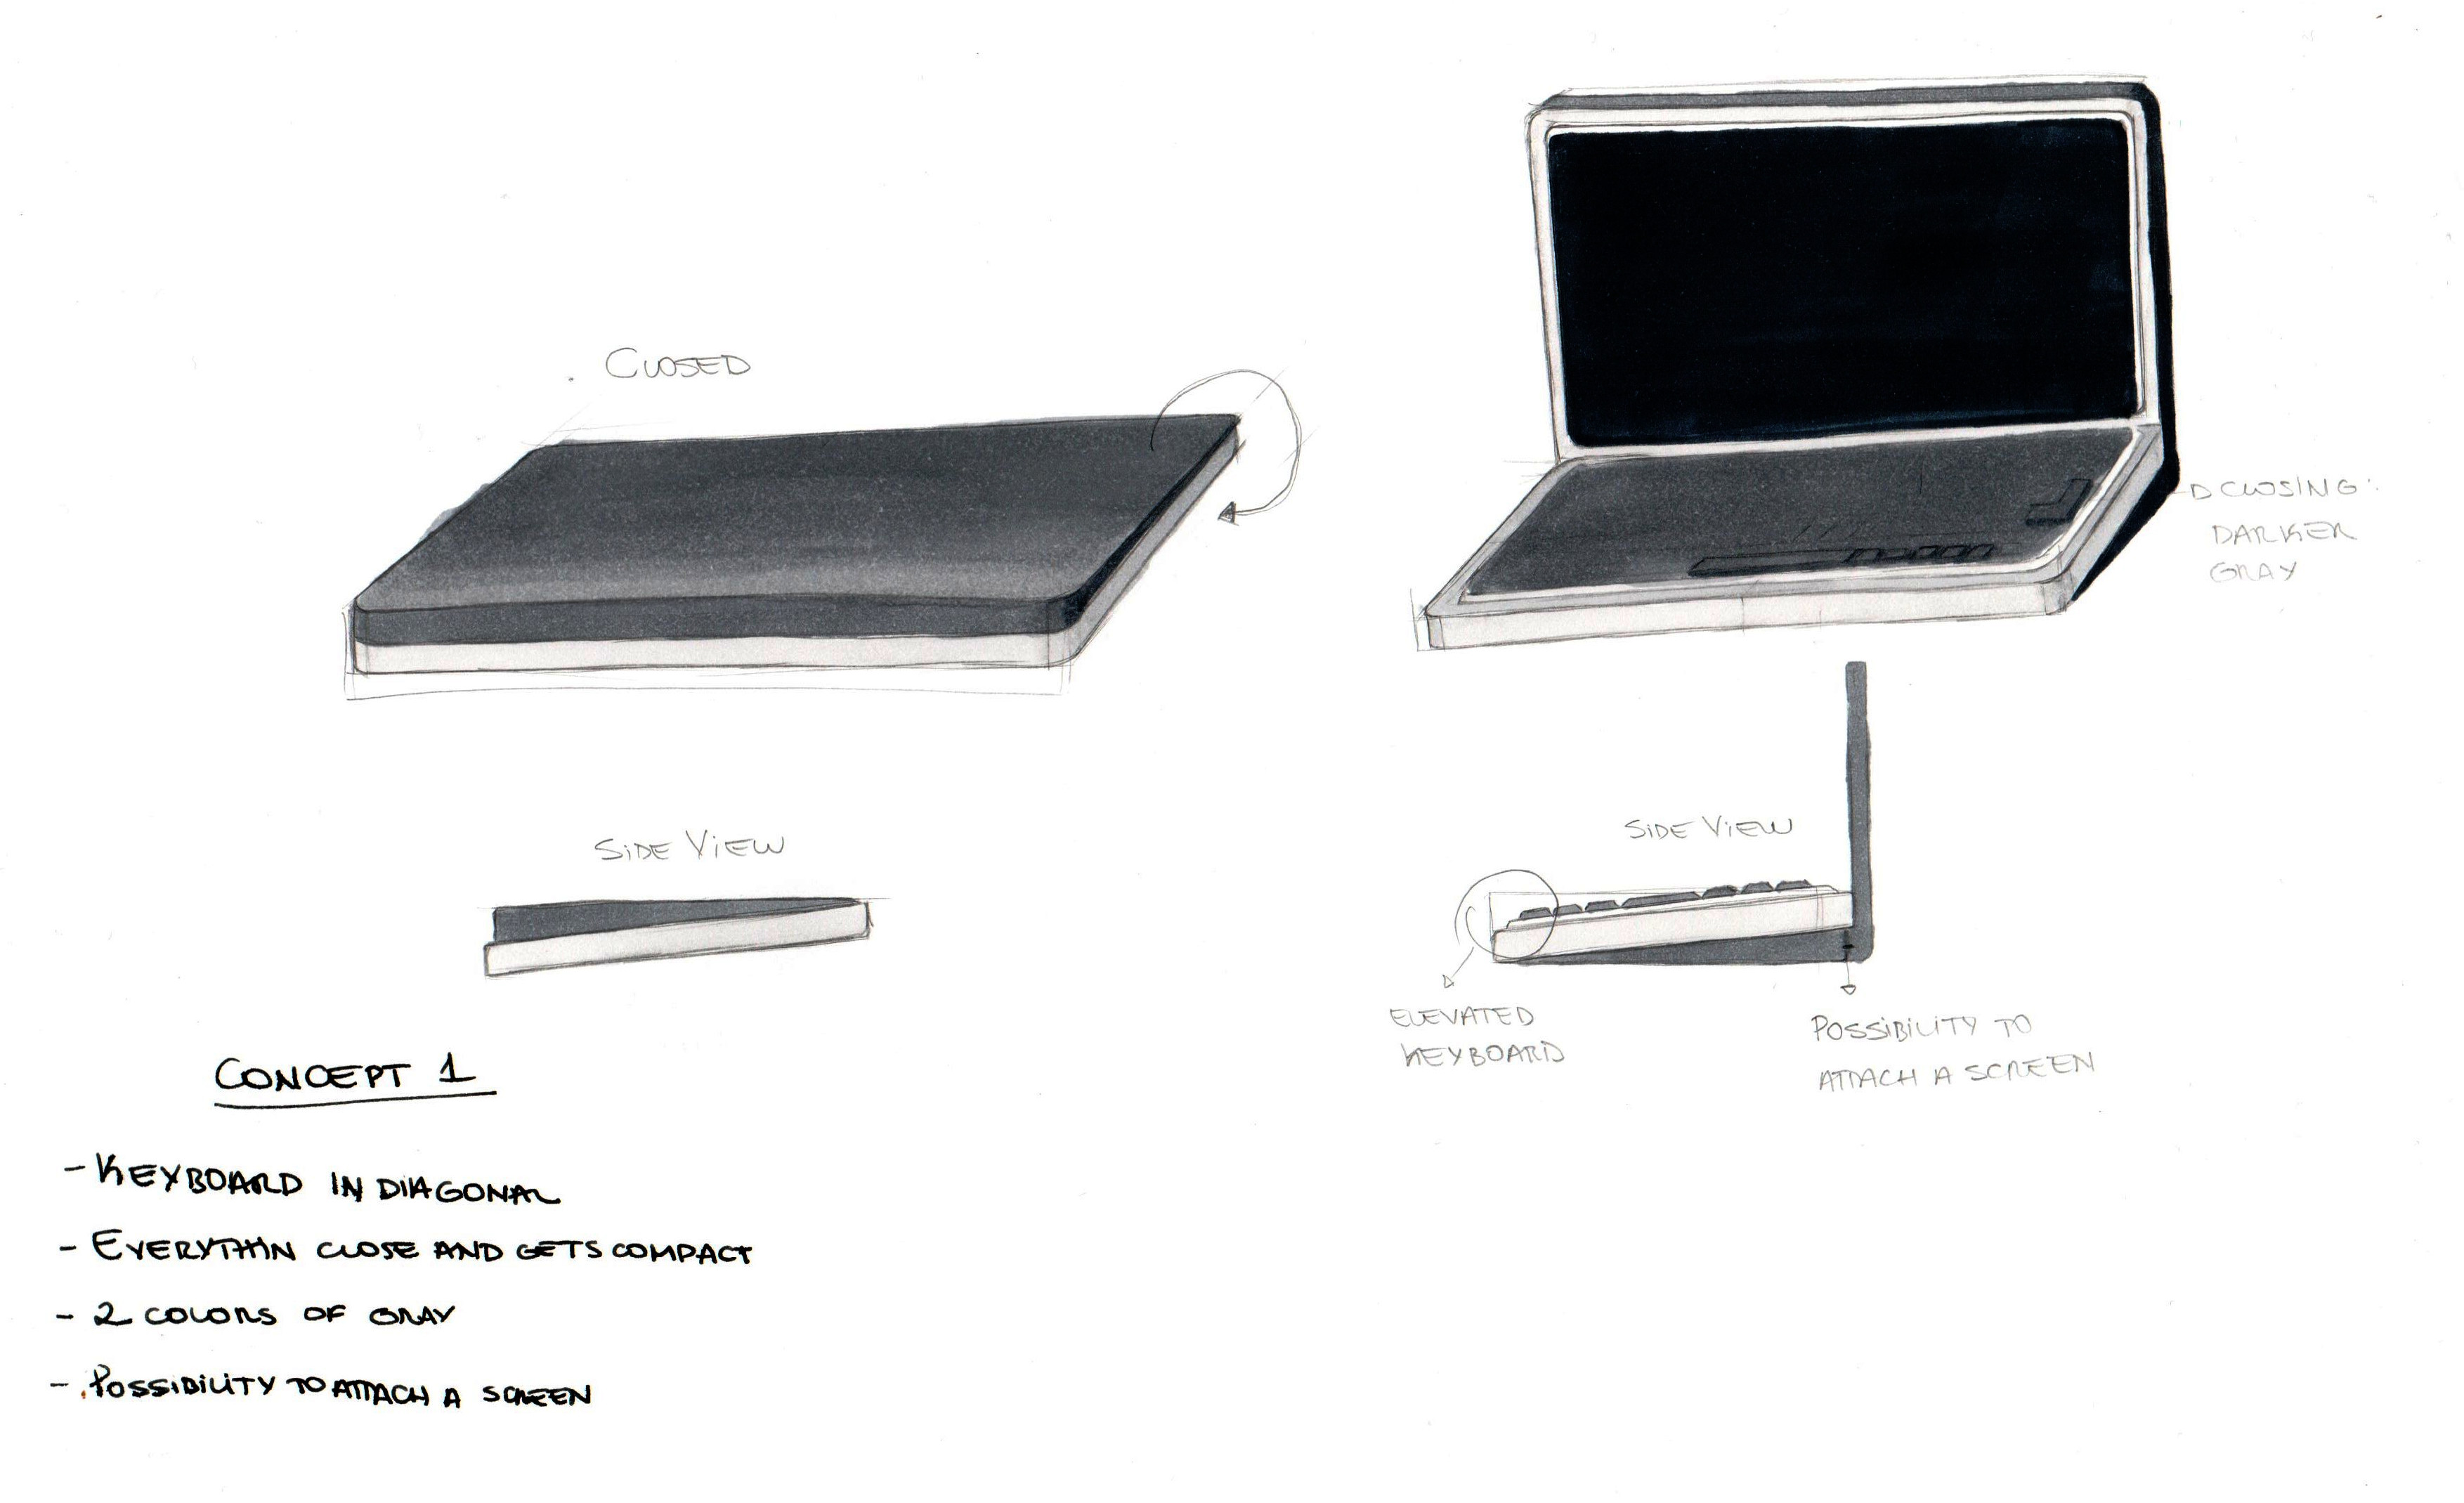
For the design of Reform, I wanted to incorporate a nod to these and other early personal computers and laptops, so that the look would convey an invitation to hack.
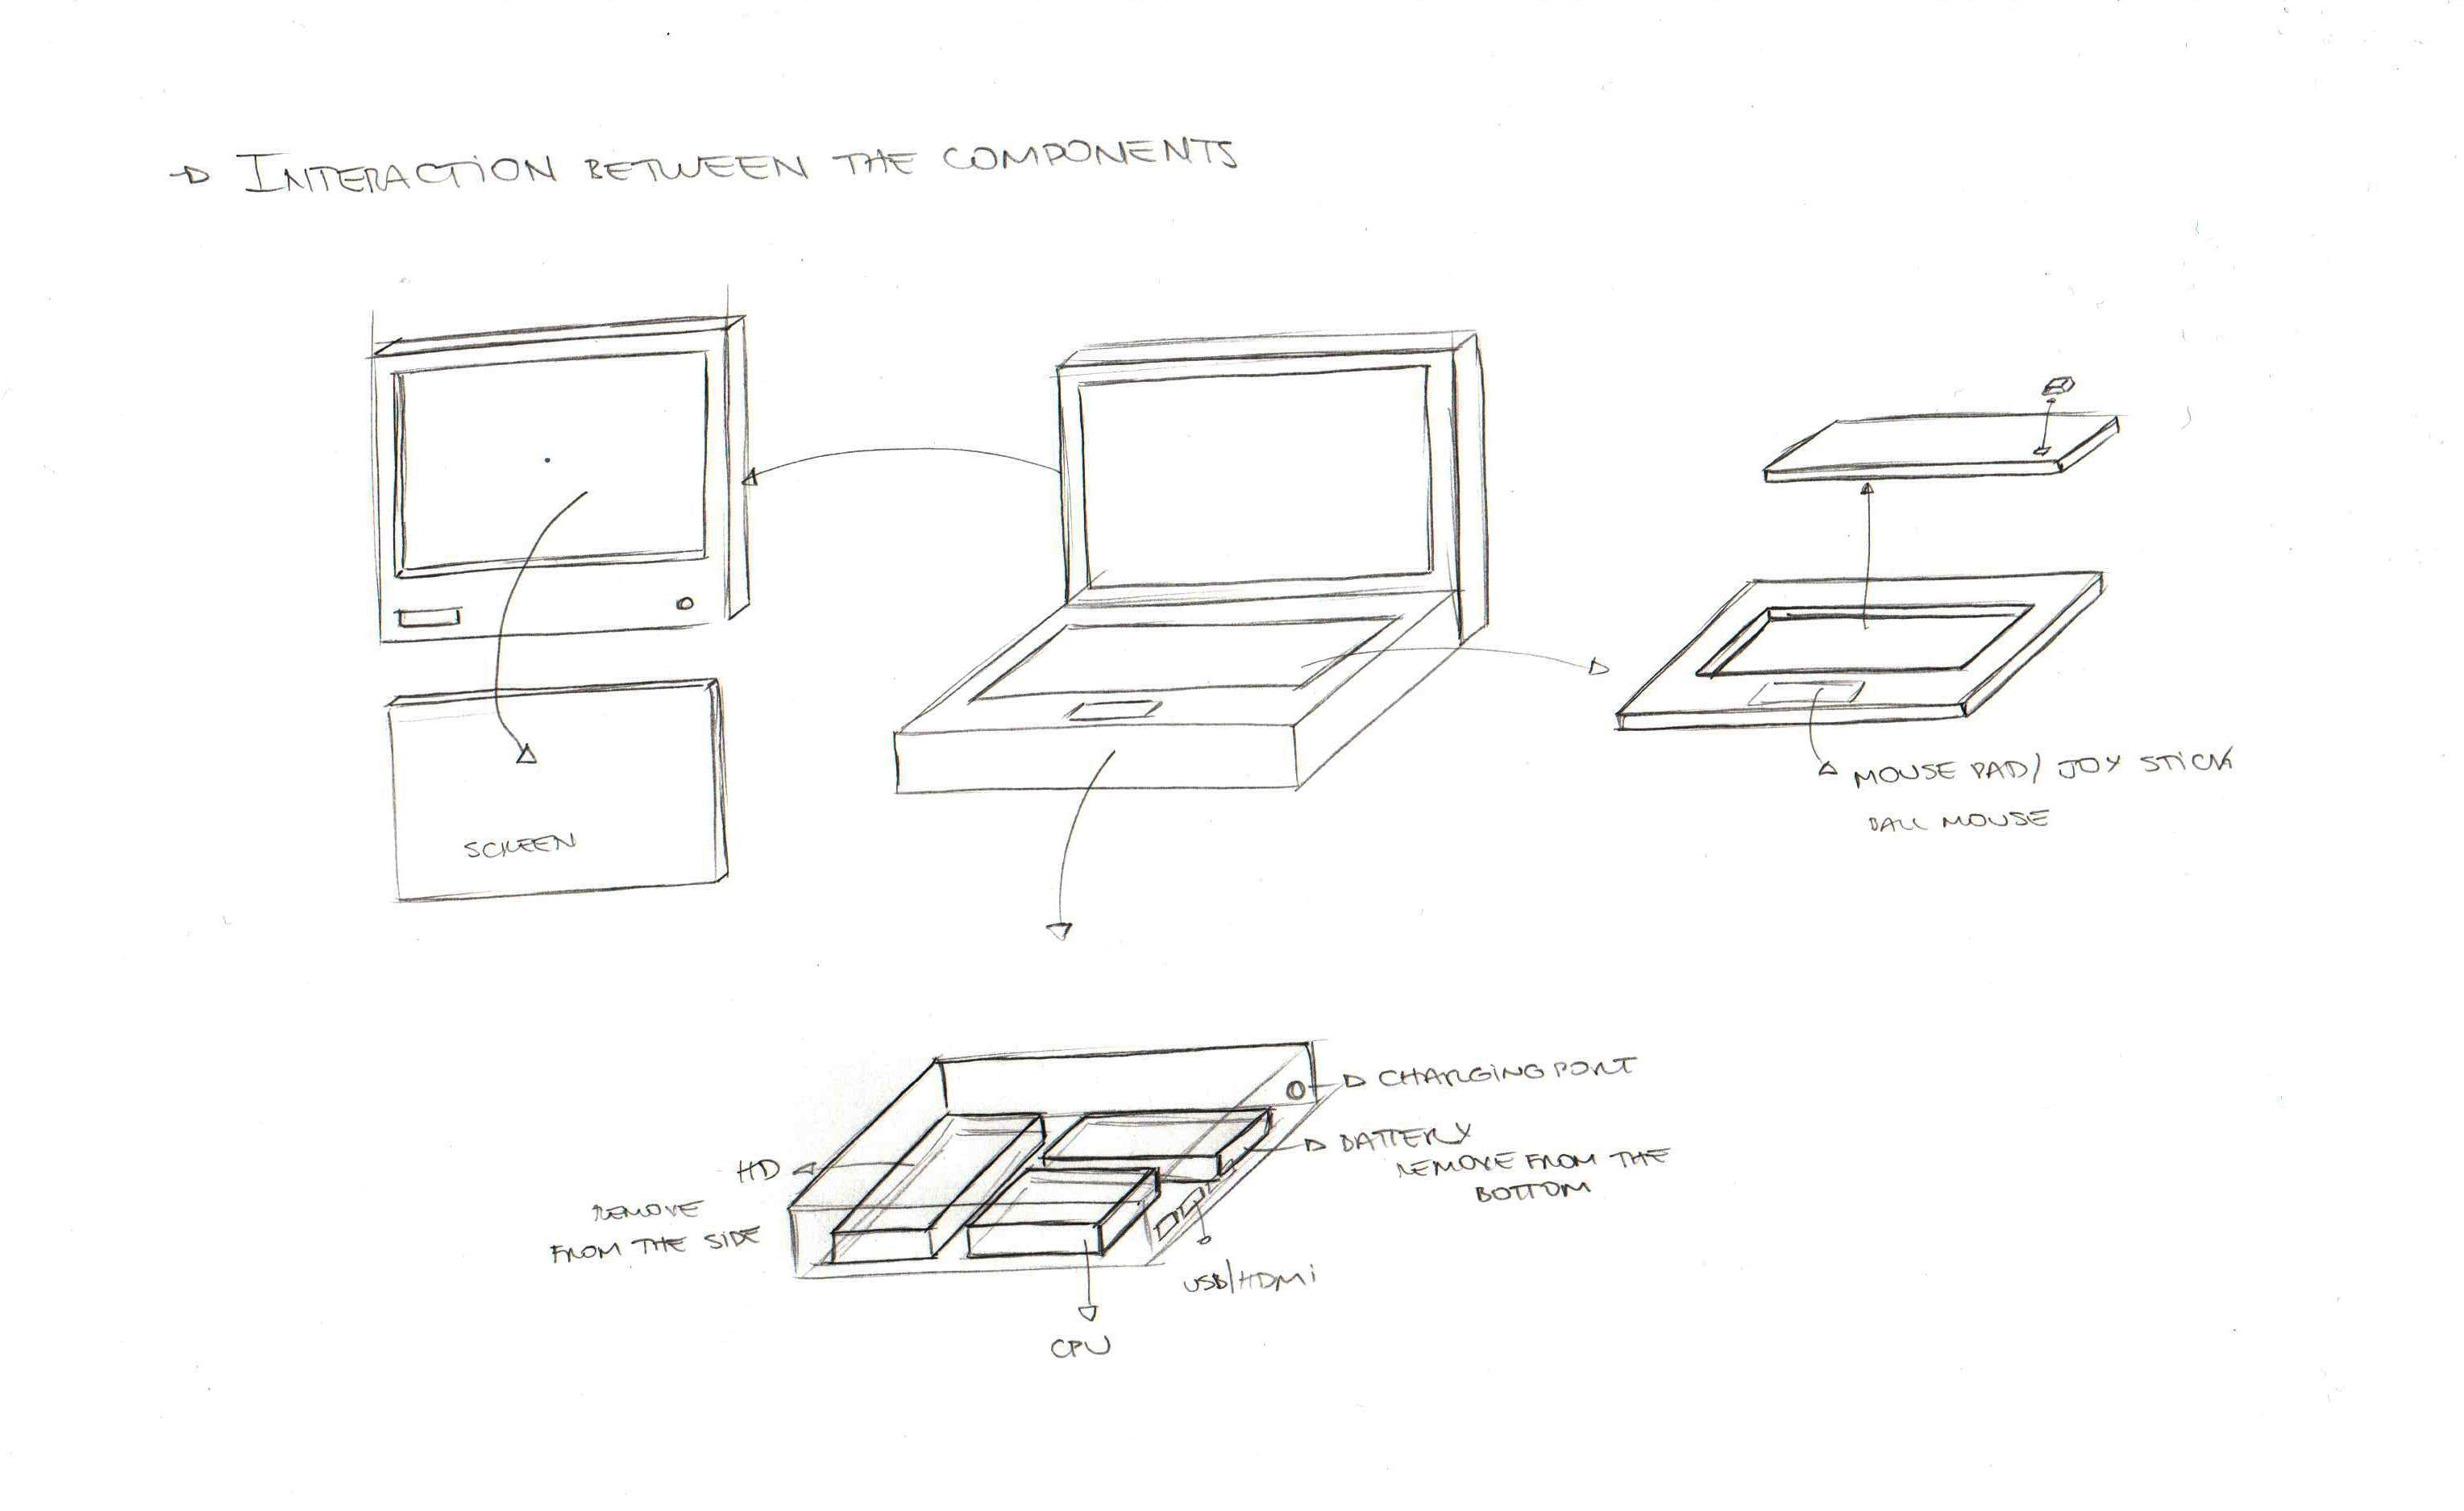
I created a moodboard of the approximate style that I had in mind and Ana used this as a reference for the shapes and colors of her first hand sketches. As a product designer, she also came up with several alternatives for dealing with the goal of modularity. While she came up with some more advanced options, we decided to go with simplicity and chose a boxy design for the first prototype.
Modularity was an important goal and differentiator from the beginning. You should be able to swap in the type of keyboard, pointing device and screen (E-Ink, anyone?) of your choice or even go without an internal screen at your desk.
We decided to include these modules in the first version:

The goal for selecting the core hardware was to strike a balance between openness and performance. On the one hand, I wanted to be able to get real work done on the machine, like compiling code, editing images or video/audio and browse the web. On the other hand it had to be as open and documented as possible, avoiding closed source drivers. I came up with these requirements:
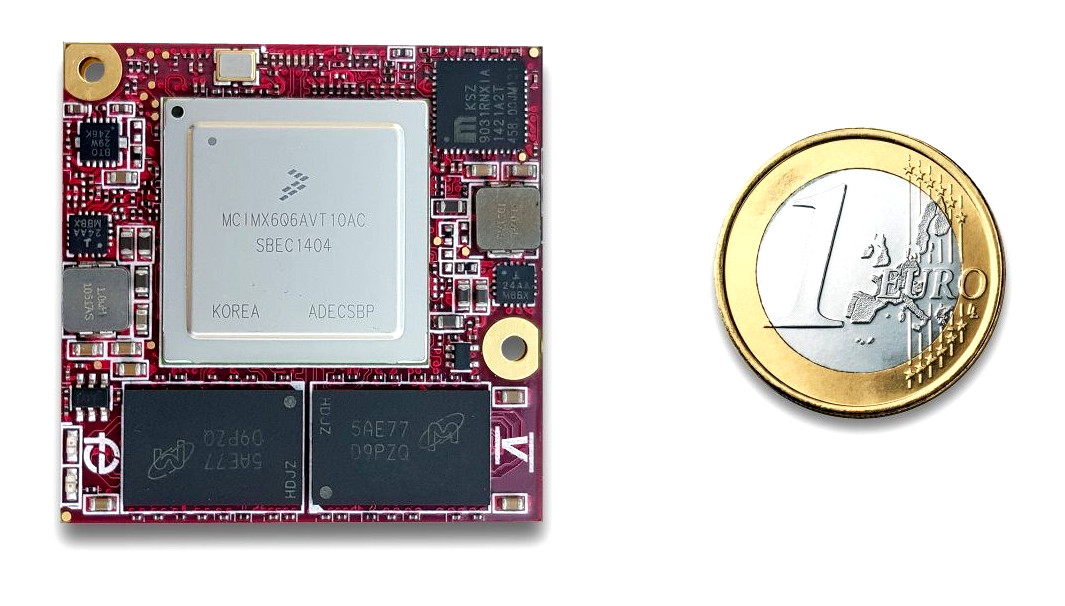
After reviewing most available SoCs and SBCs I settled (like Bunnie in the Novena) on the NXP i.MX6 QuadPlus SoC, which has four ARM Cortex-A9 cores running at up to 1.2 GHz and a Vivante GC2000 GPU for which completely open source drivers are available (etnaviv). Complete documentation for the SoC is available from NXP as PDFs without registration or NDAs. I chose the TinyRex Ultra by Fedevel/Voipac as our evaluation board, because it is a tiny, low-cost system-on-module with 4GB of memory, and it can be plugged into an open source carrier board. For the next iteration, I might go with the open schematics version iMX6 Rex.
While the i.MX6 looks a bit dated on paper and can't compete with the Core i7 in my old MacBook Pro, its real-world performance is good enough for the kind of work I wanted to use it for. Also, the much more powerful 64-bit, 6-core i.MX8 is around the corner. With a bit of luck, the second prototype of the computer will coincide with its launch.
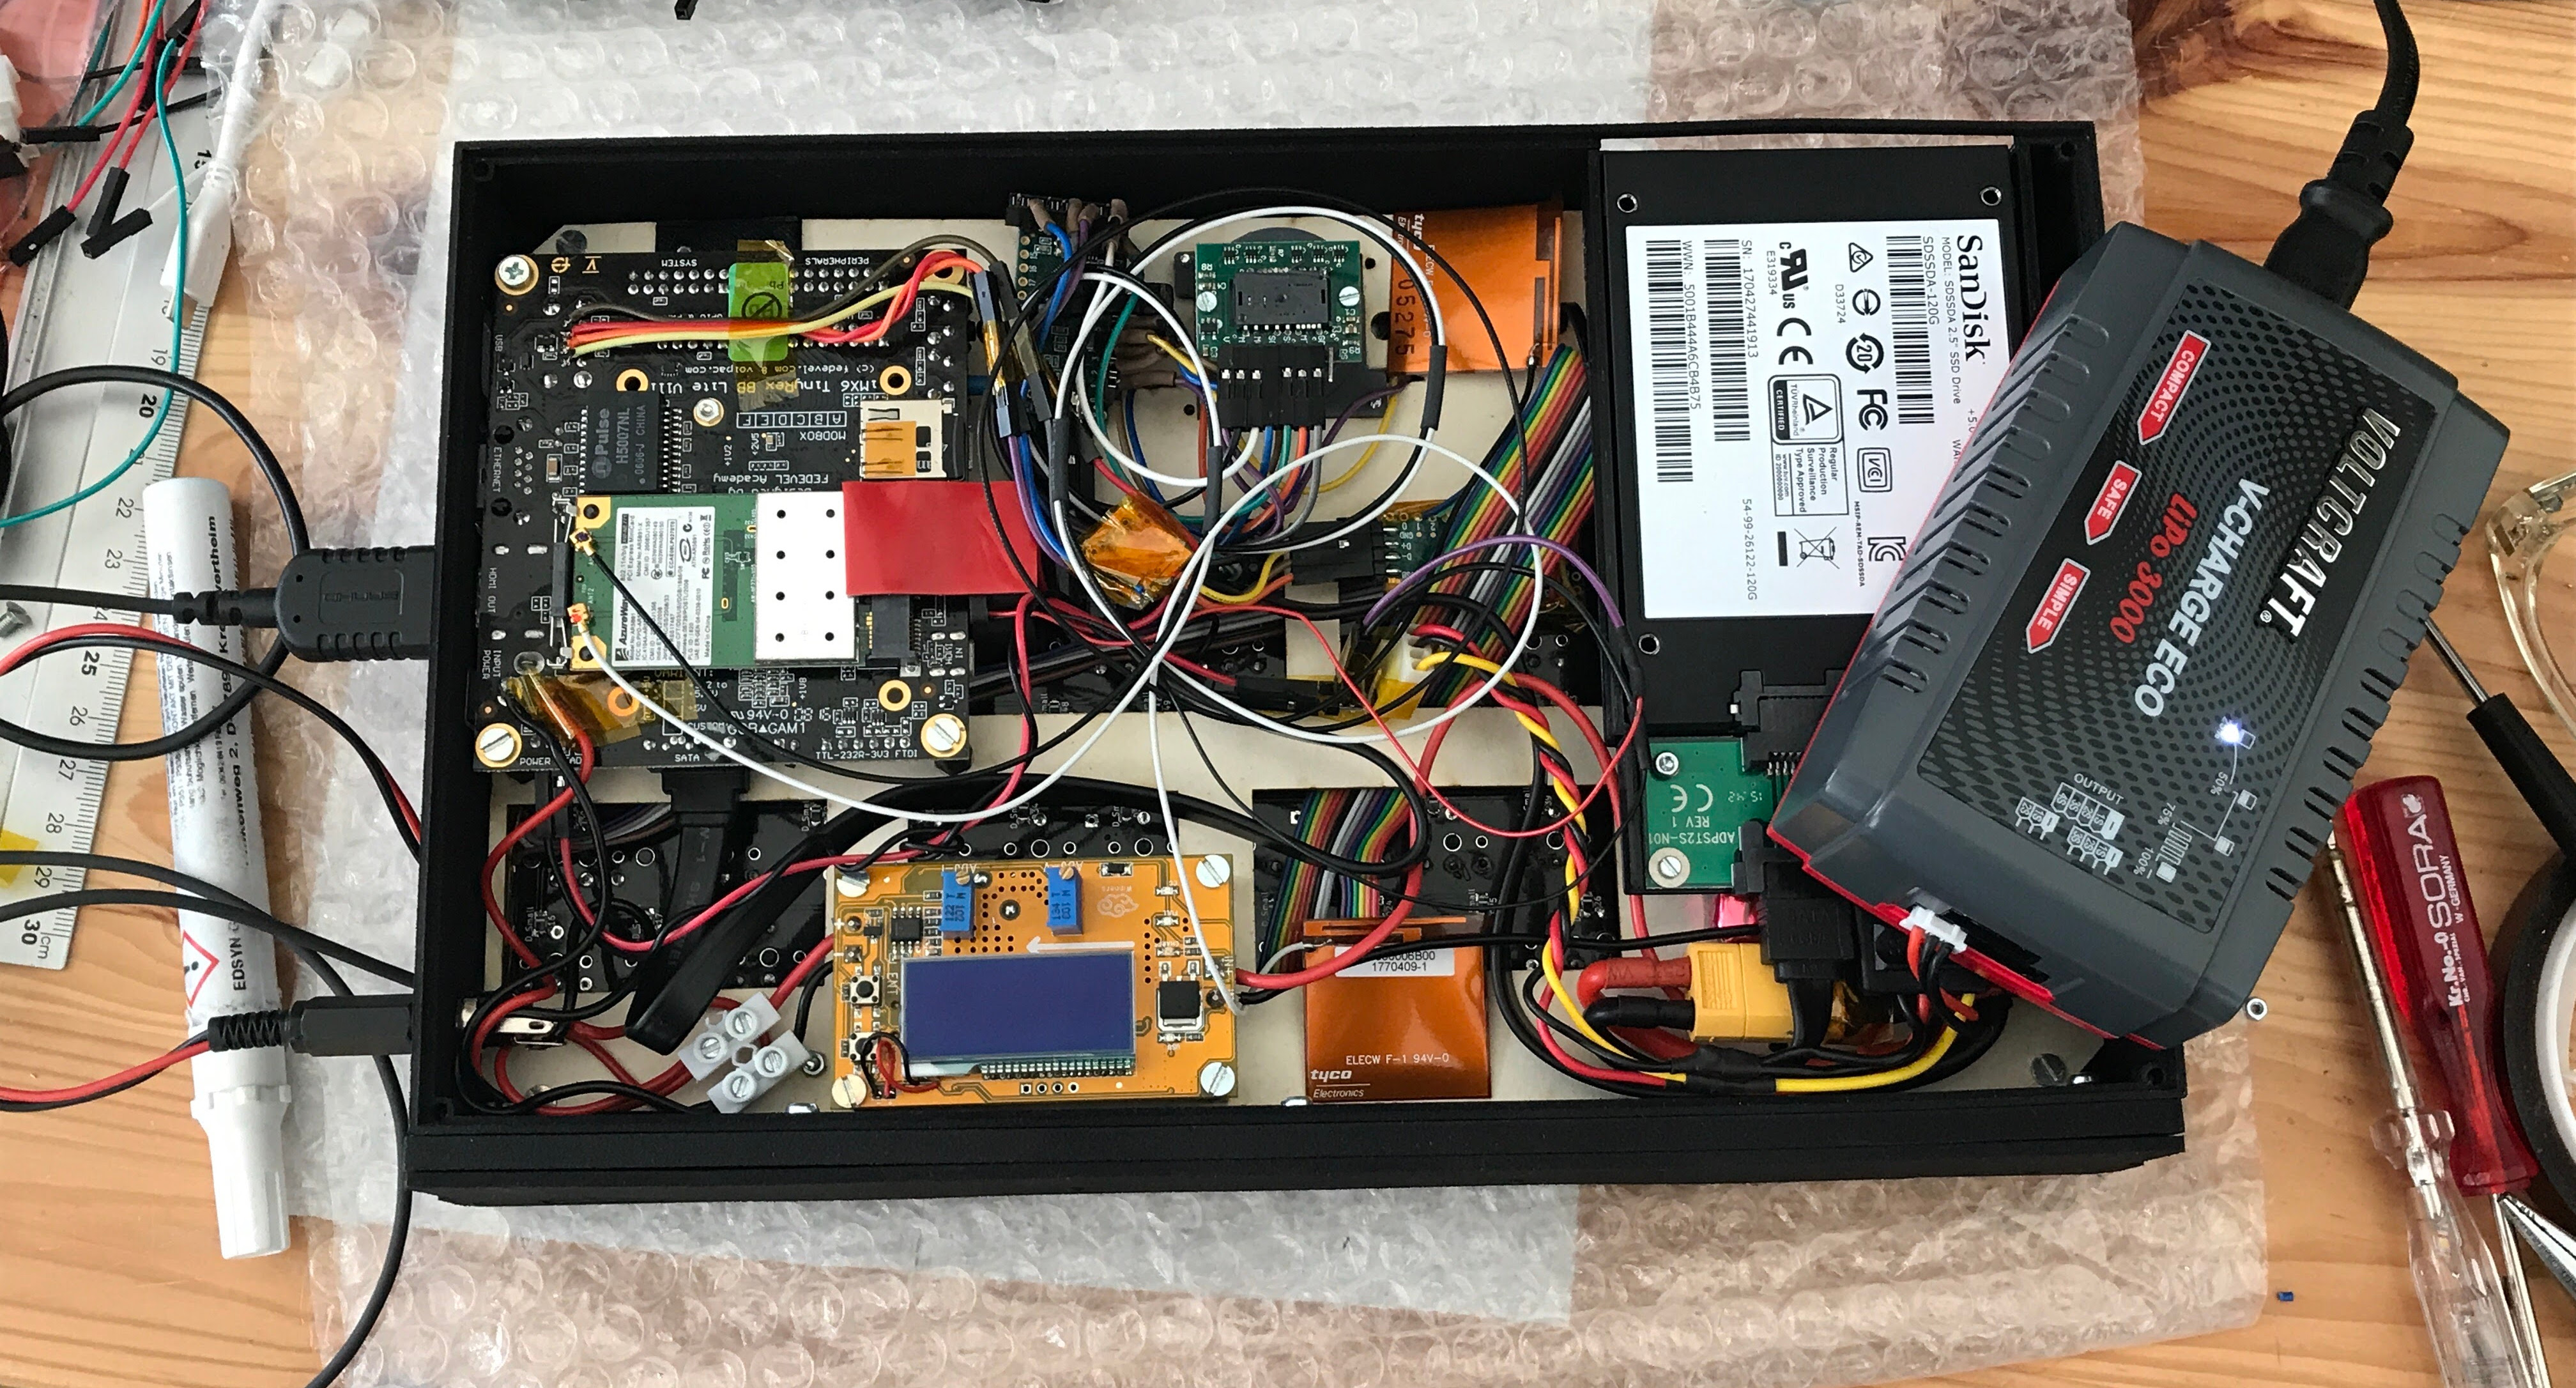
While i.MX6QP has an integrated USB2.0 Host Controller which is fine to connect the input devices and a sound module, USB3.0/3.1 are attractive because of their high bandwidth and charging via USB-C. These could be integrated on the new motherboard and a chip attached to the PCIe bus. I tested the Penguin Wireless N Mini PCIe card in the dev board's Mini PCIe slot and it works great with the open source ath9k drivers.
The system starts U-Boot from a MiniSD card which in turn loads Linux from a 120GB SanDisk SATA SSD. We included a compartment and a slot that accepts 2.5" SATA SSD drives for easy swapping.
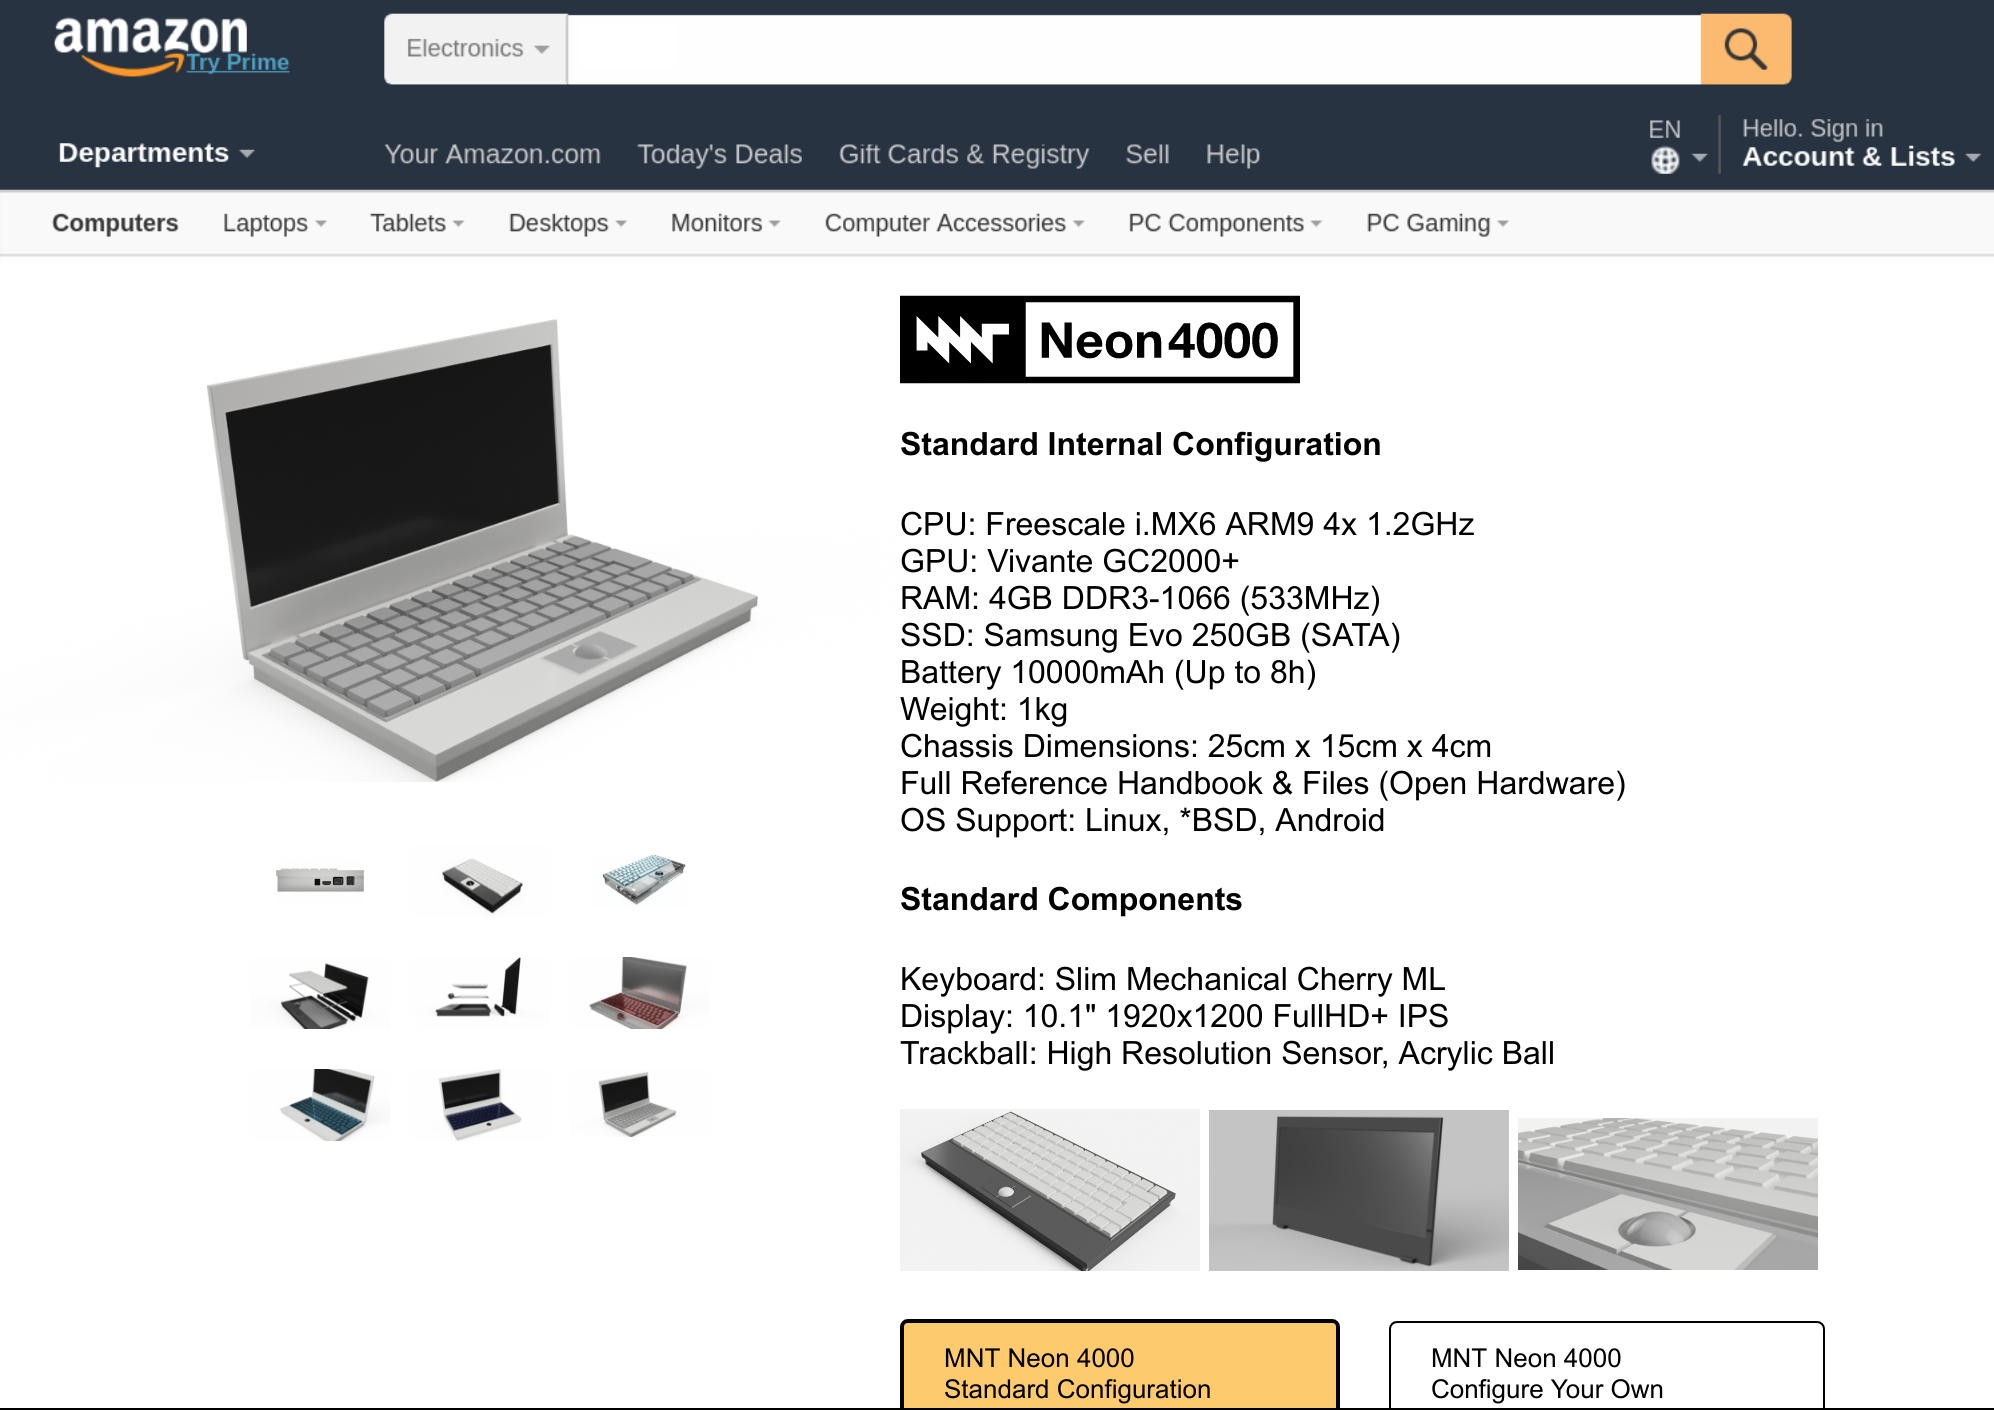
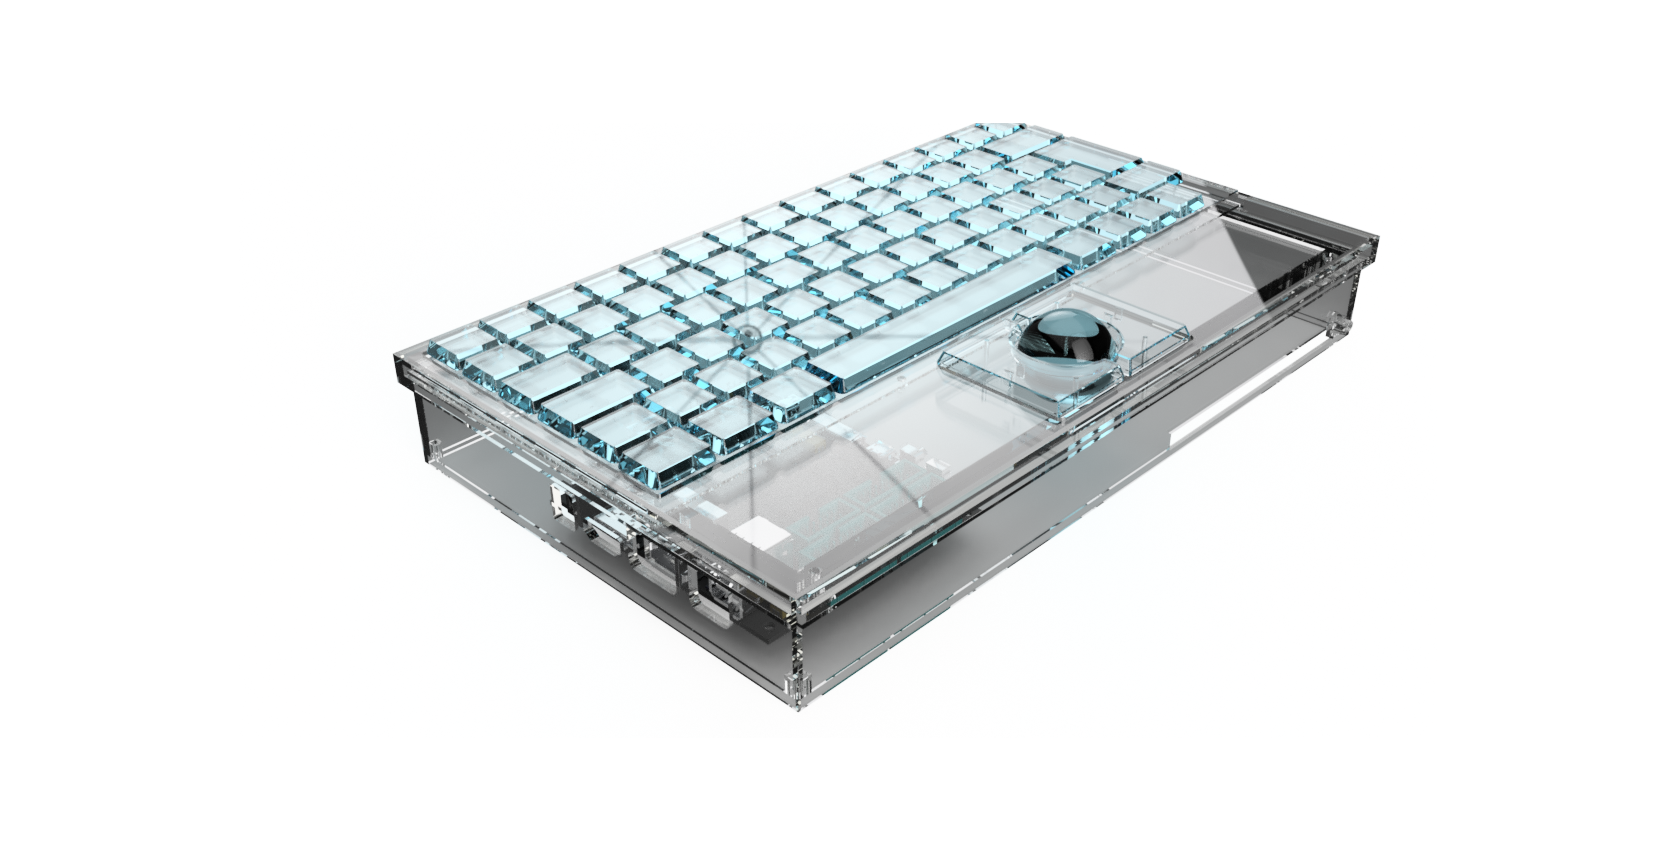
Ana encouraged me to set up a user pre-validation test to check if we were on the right track concerning the overall concept, choice of parts and pricing. We put together a fake Amazon page with renderings and a description of our device surrounded by two alternative choices. We positioned our computer in the middle of the price range (500-700 EUR) and focused on offering a complete DIY package (not only a board) and higher specs and customizability than another low-cost project. The mainly positive interviews with pre-filtered testers made us confident that we were on the right path.
All testers were excited about an optional E-Ink display, but this drives up the price by at least 200-300 EUR. Also, controller options were unclear, so we postponed prototyping of this option.
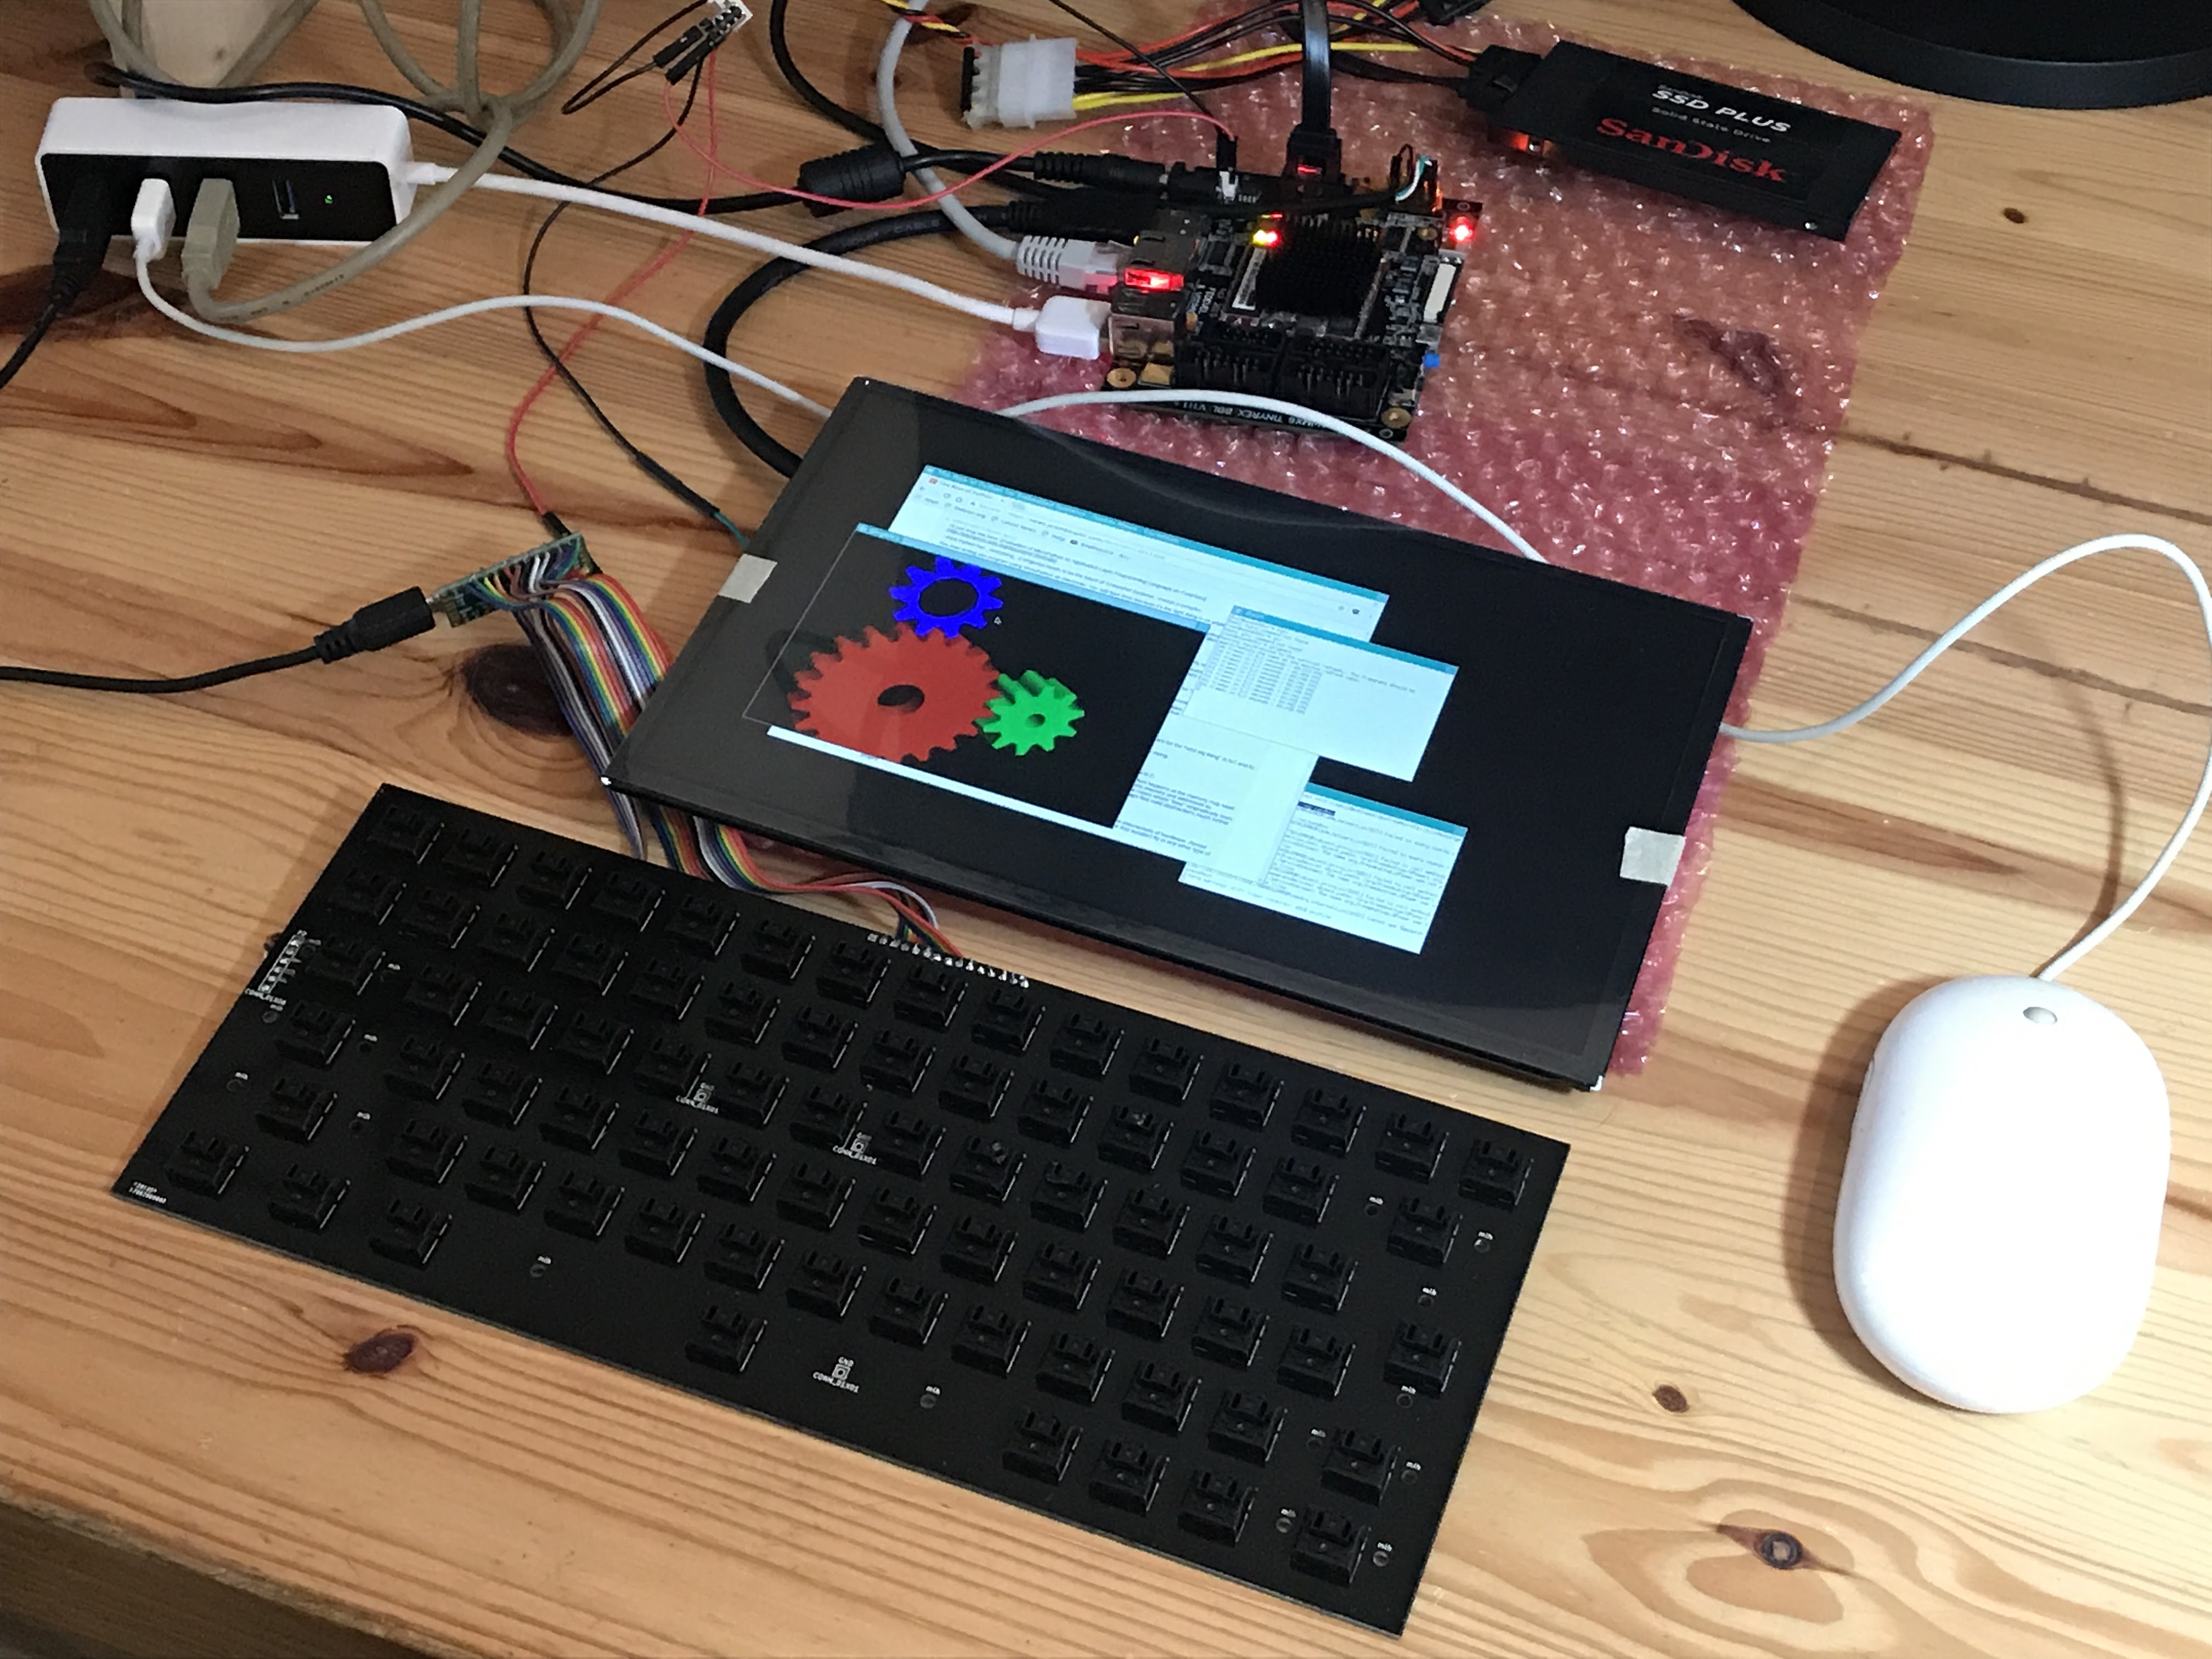


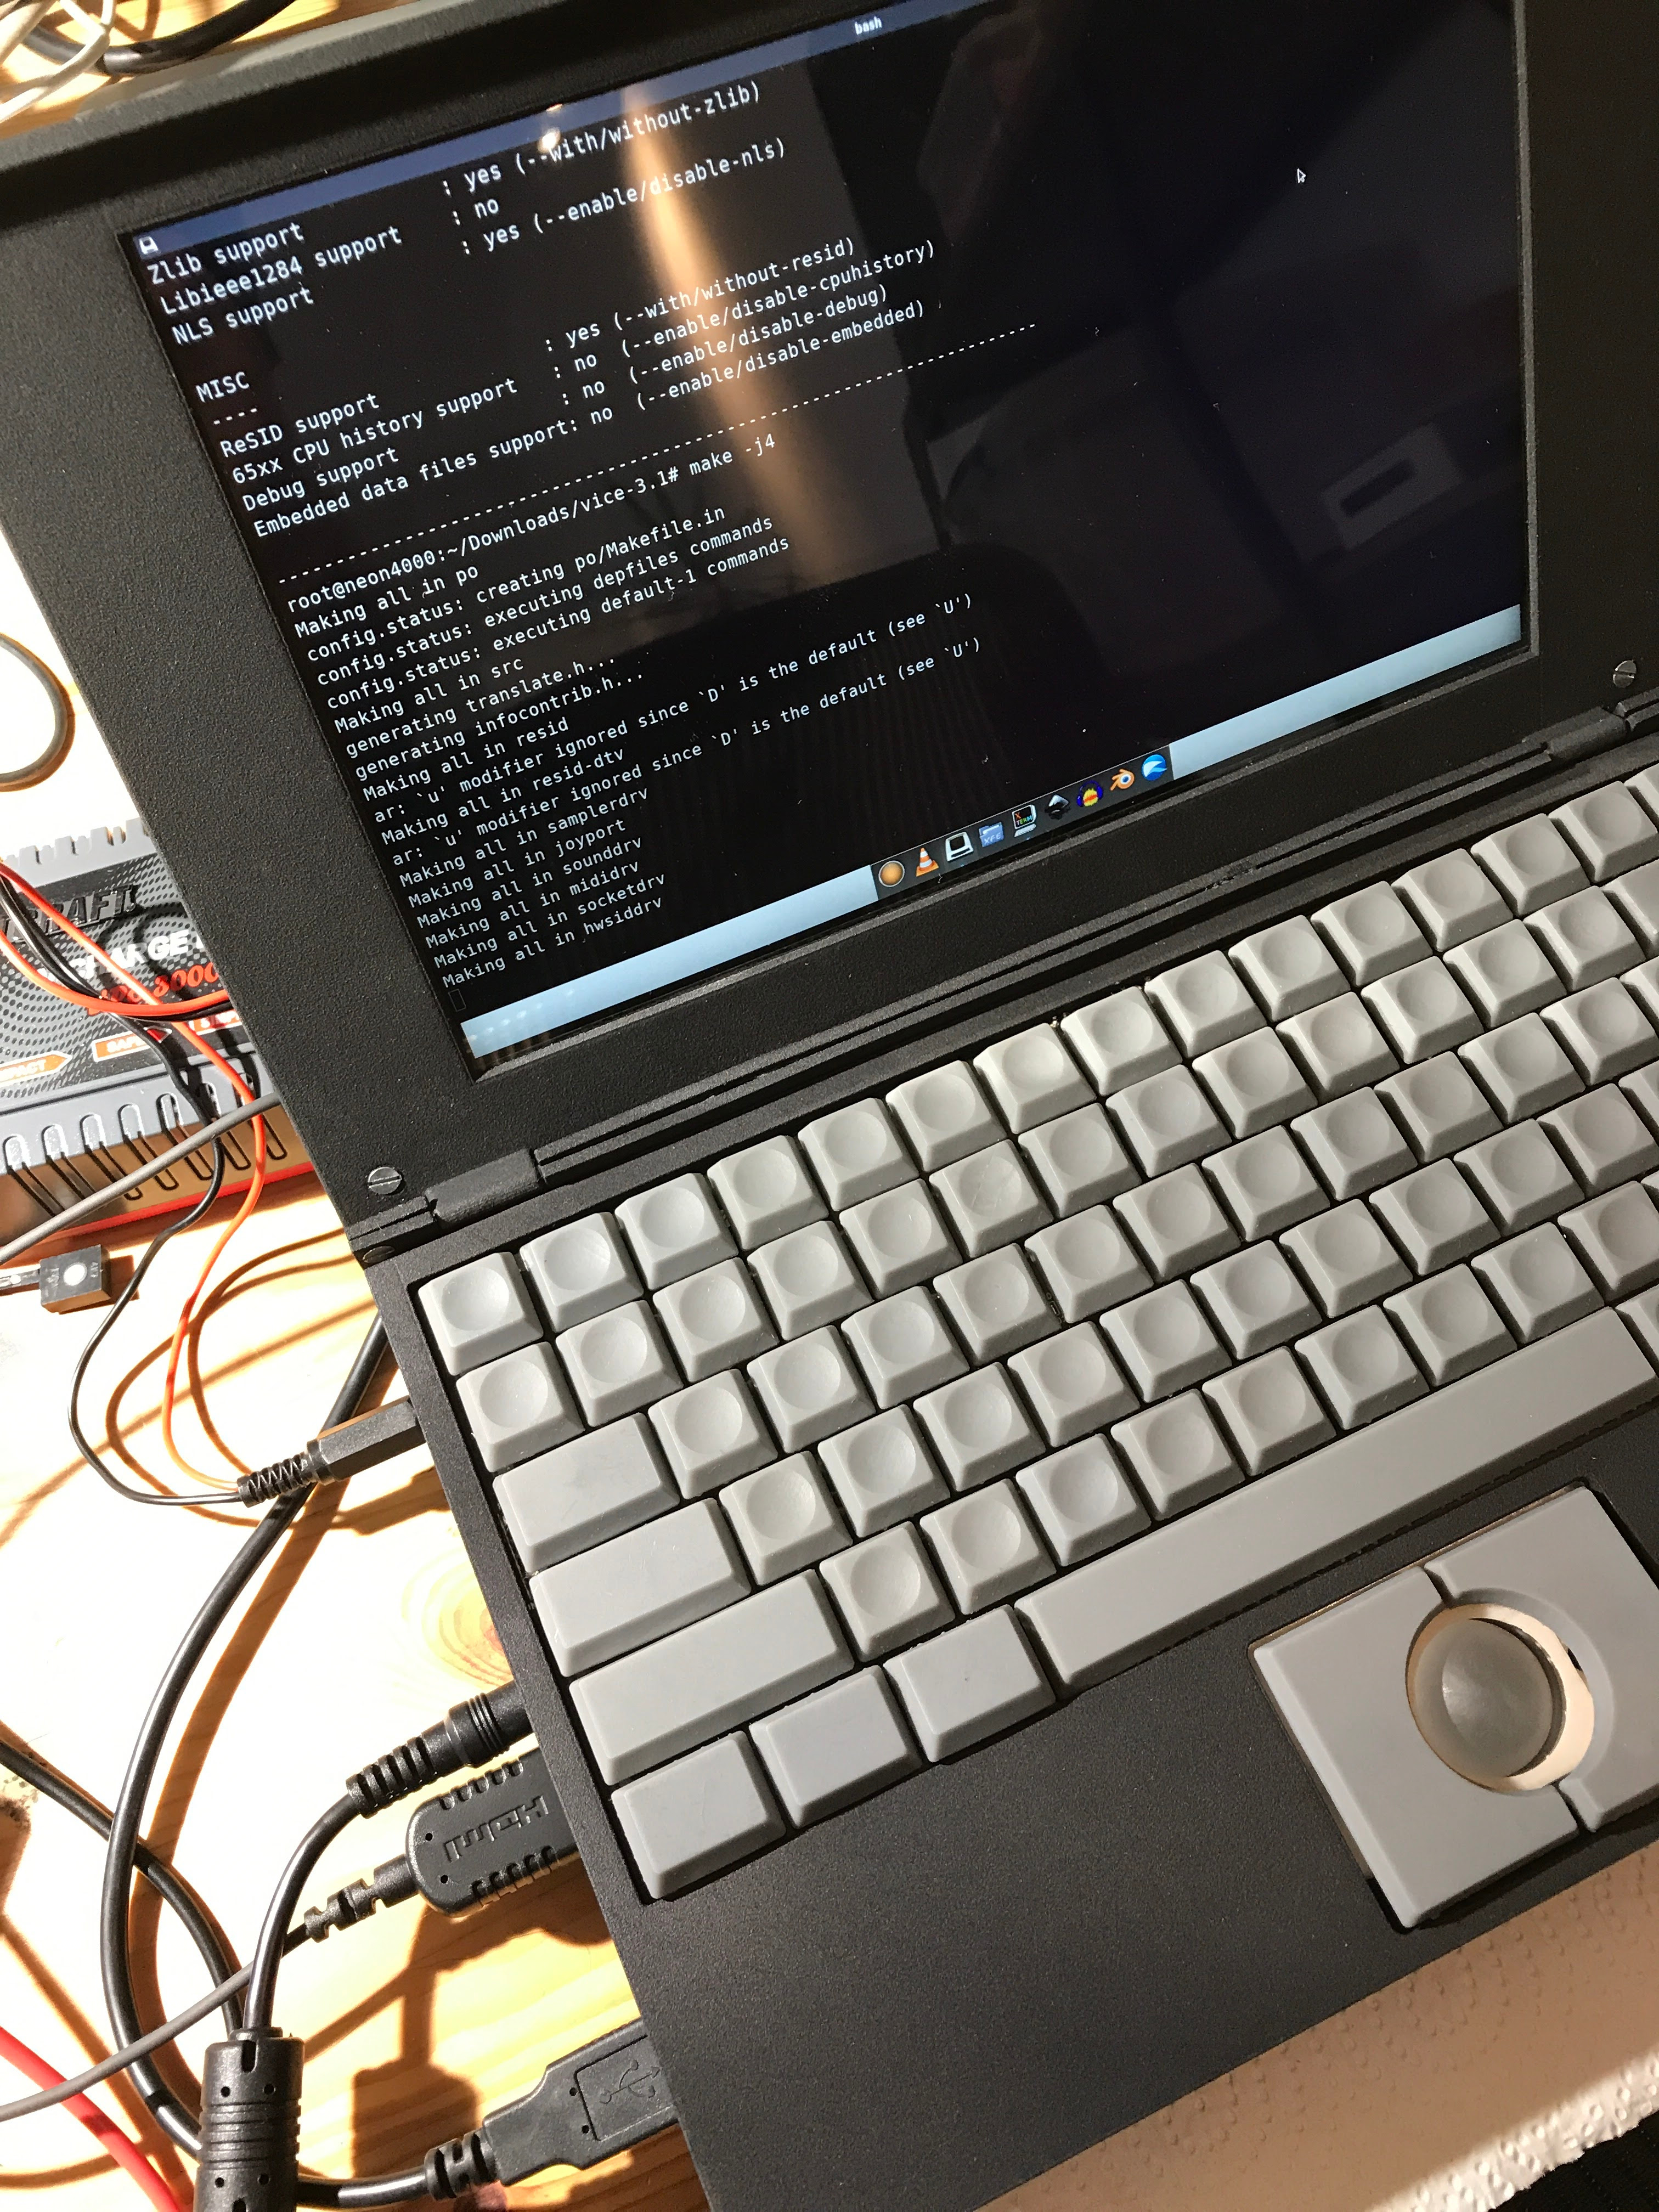
The first thing I wanted to make sure was the possibility of running mainline Linux on the machine, without using any proprietary binary blobs or drivers — while still being able to use basic GPU acceleration. With some important hints from kernel developer Lukas Stach I was able to bring up a usable Linux desktop with Debian userland and OpenGL on my TinyRex development board hooked up to a battery. This validated the main technology decision.
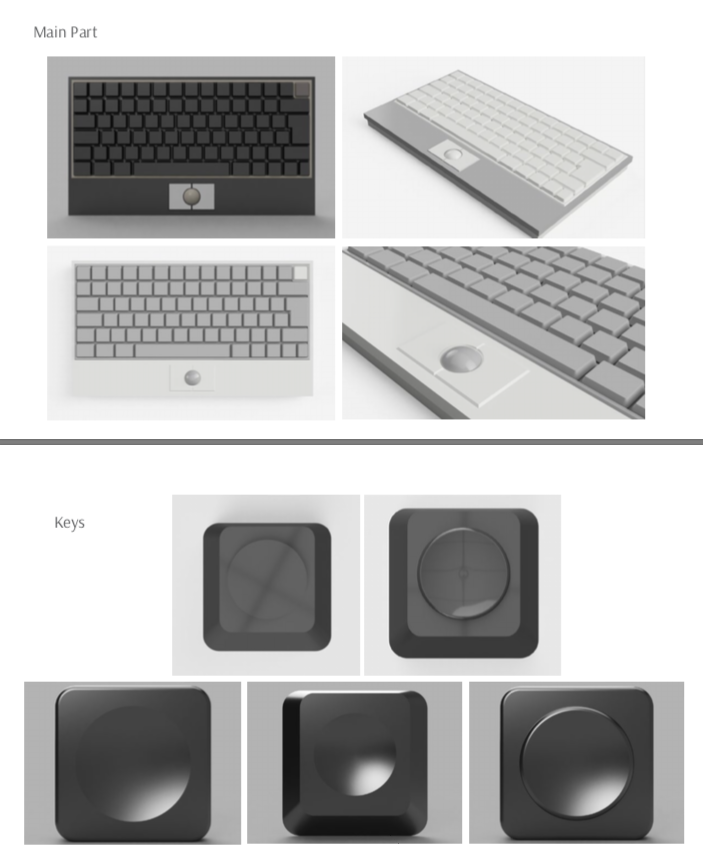
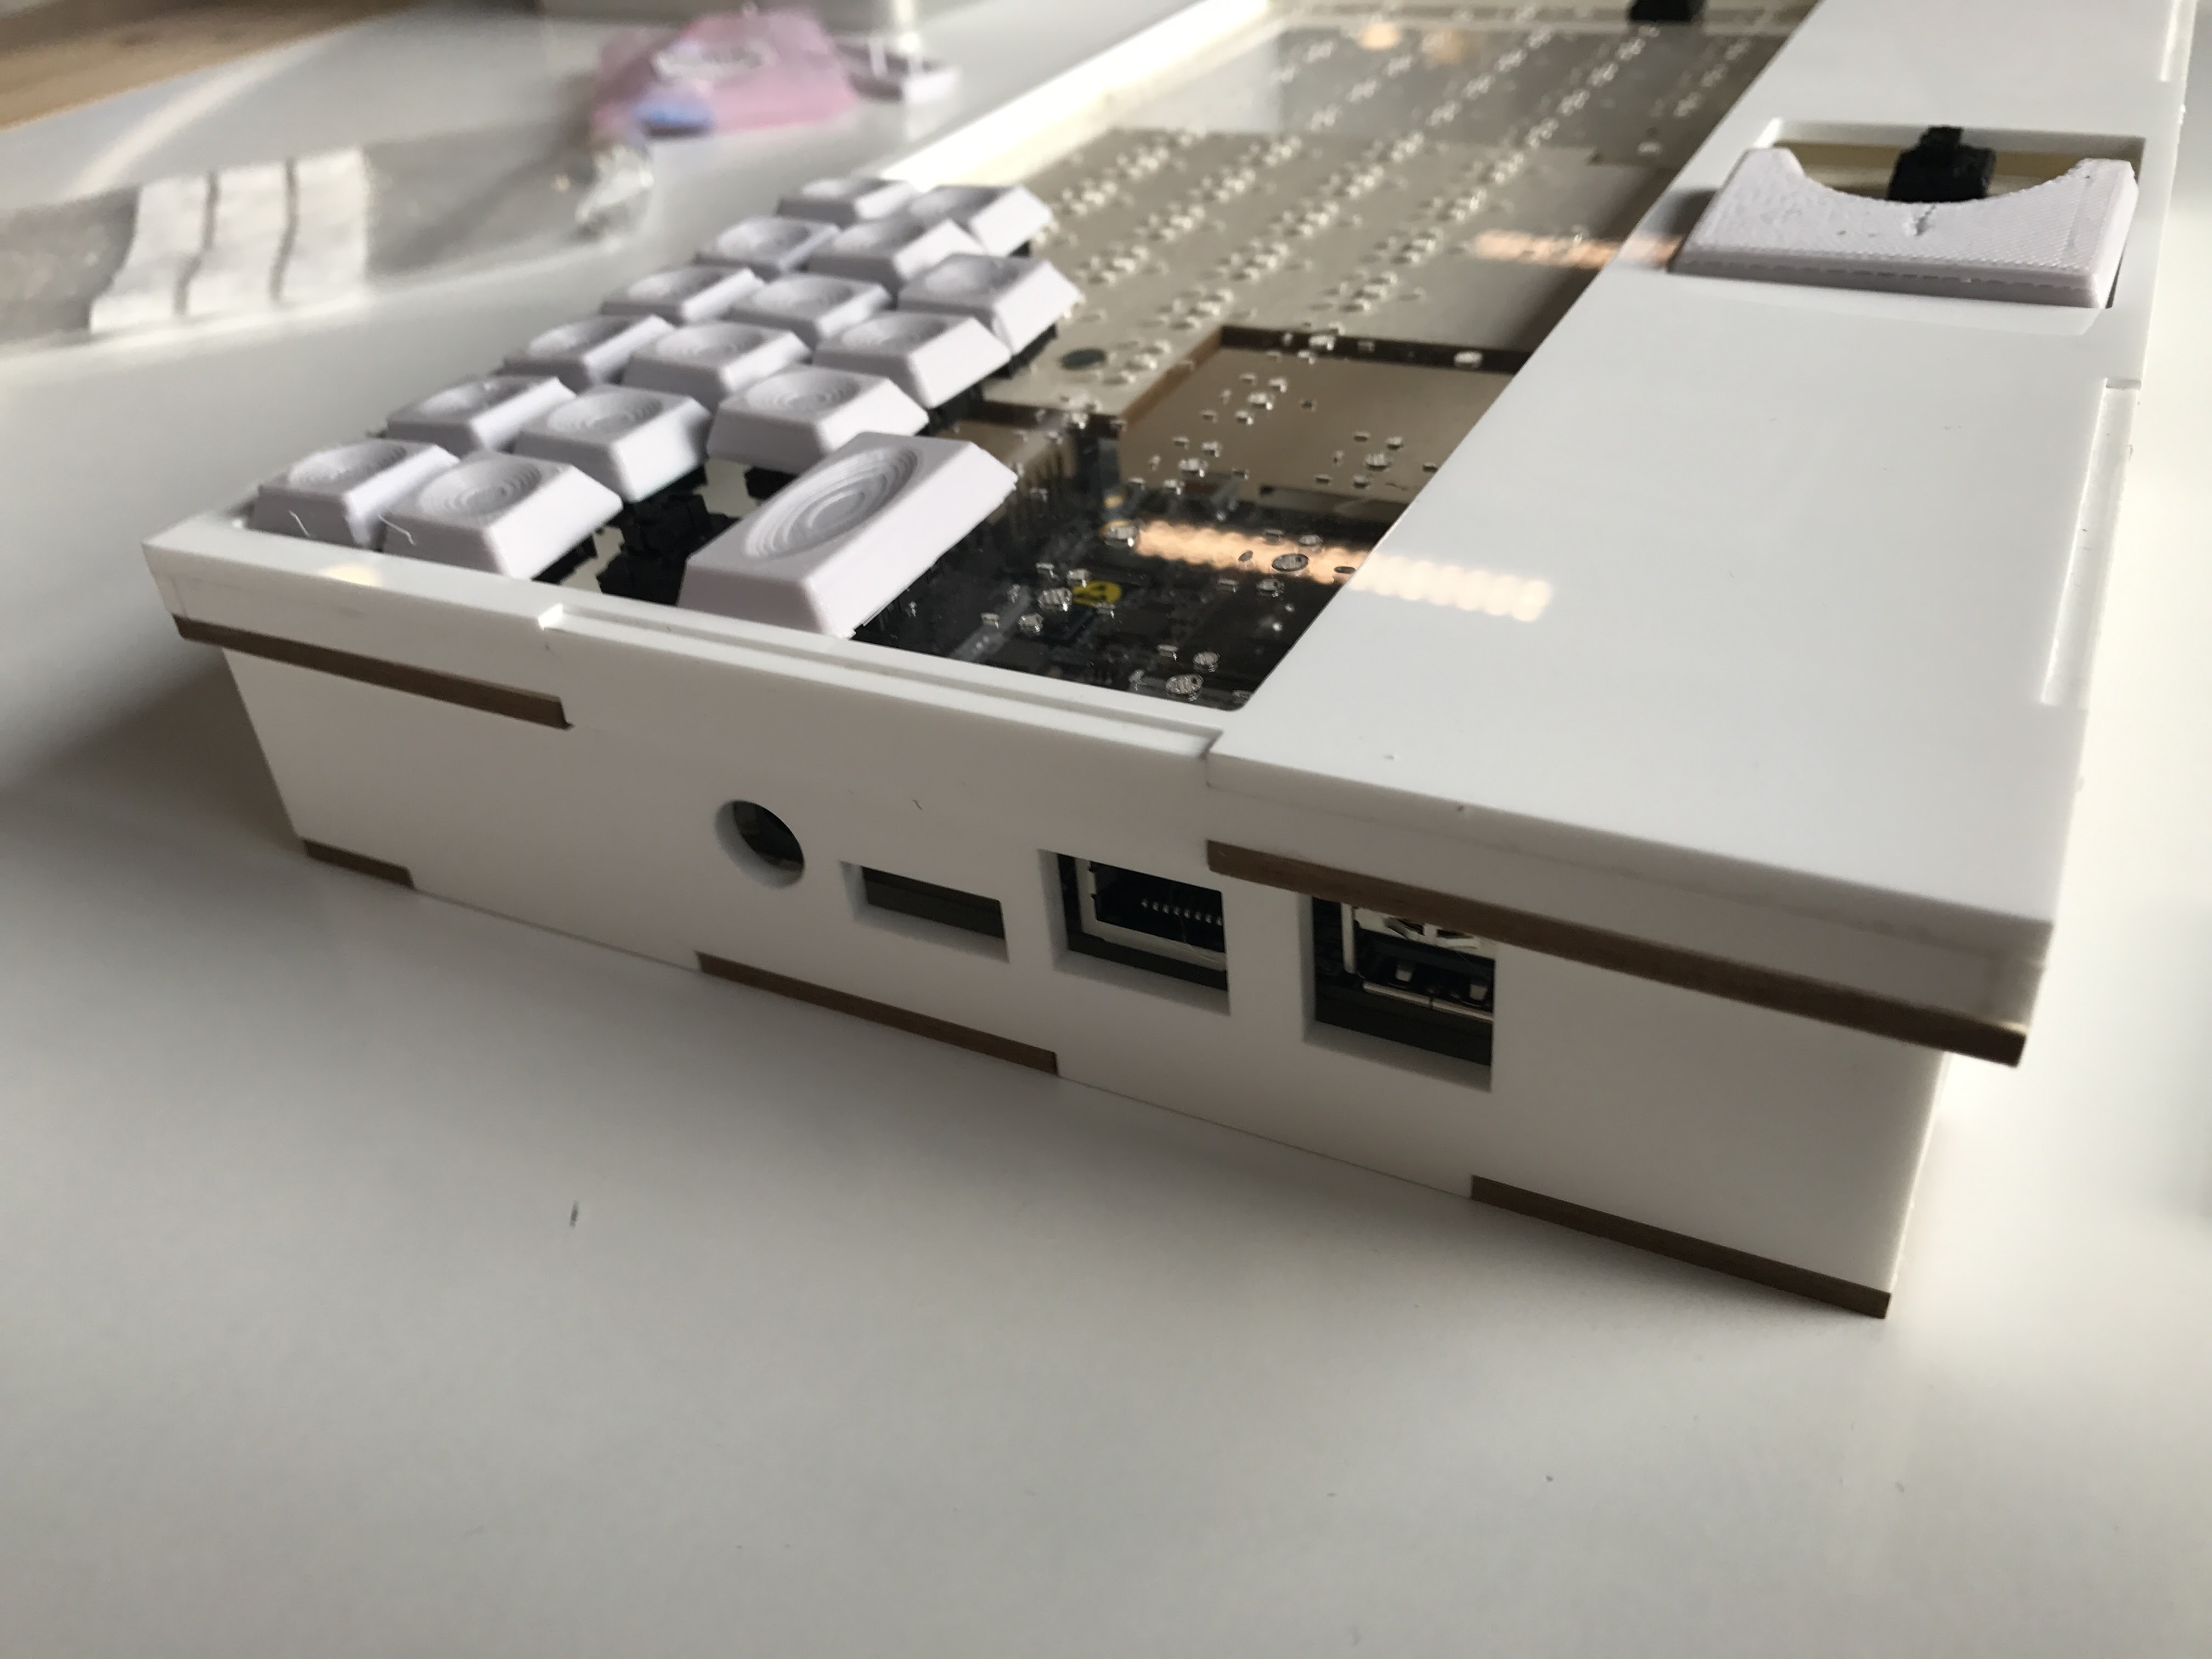
For the first variant of the keyboard, I was looking for DIY- and typing-friendly keyswitches. The Cherry ML switch sits in a sweet spot between full-size mechanical keys and laptop chiclet keys, but I couldn't get them at Digikey or Mouser. Calling Cherry's headquarters in Munich was fruitful: they pointed me to a partner company that would then sell me a minimum quantity of 2000 switches. I made a KiCAD component for them, drew up a keyboard PCB and ordered it at Dangerous Prototypes. Hooking the assembled board up to a Teensy LC yielded a usable laptop keyboard.
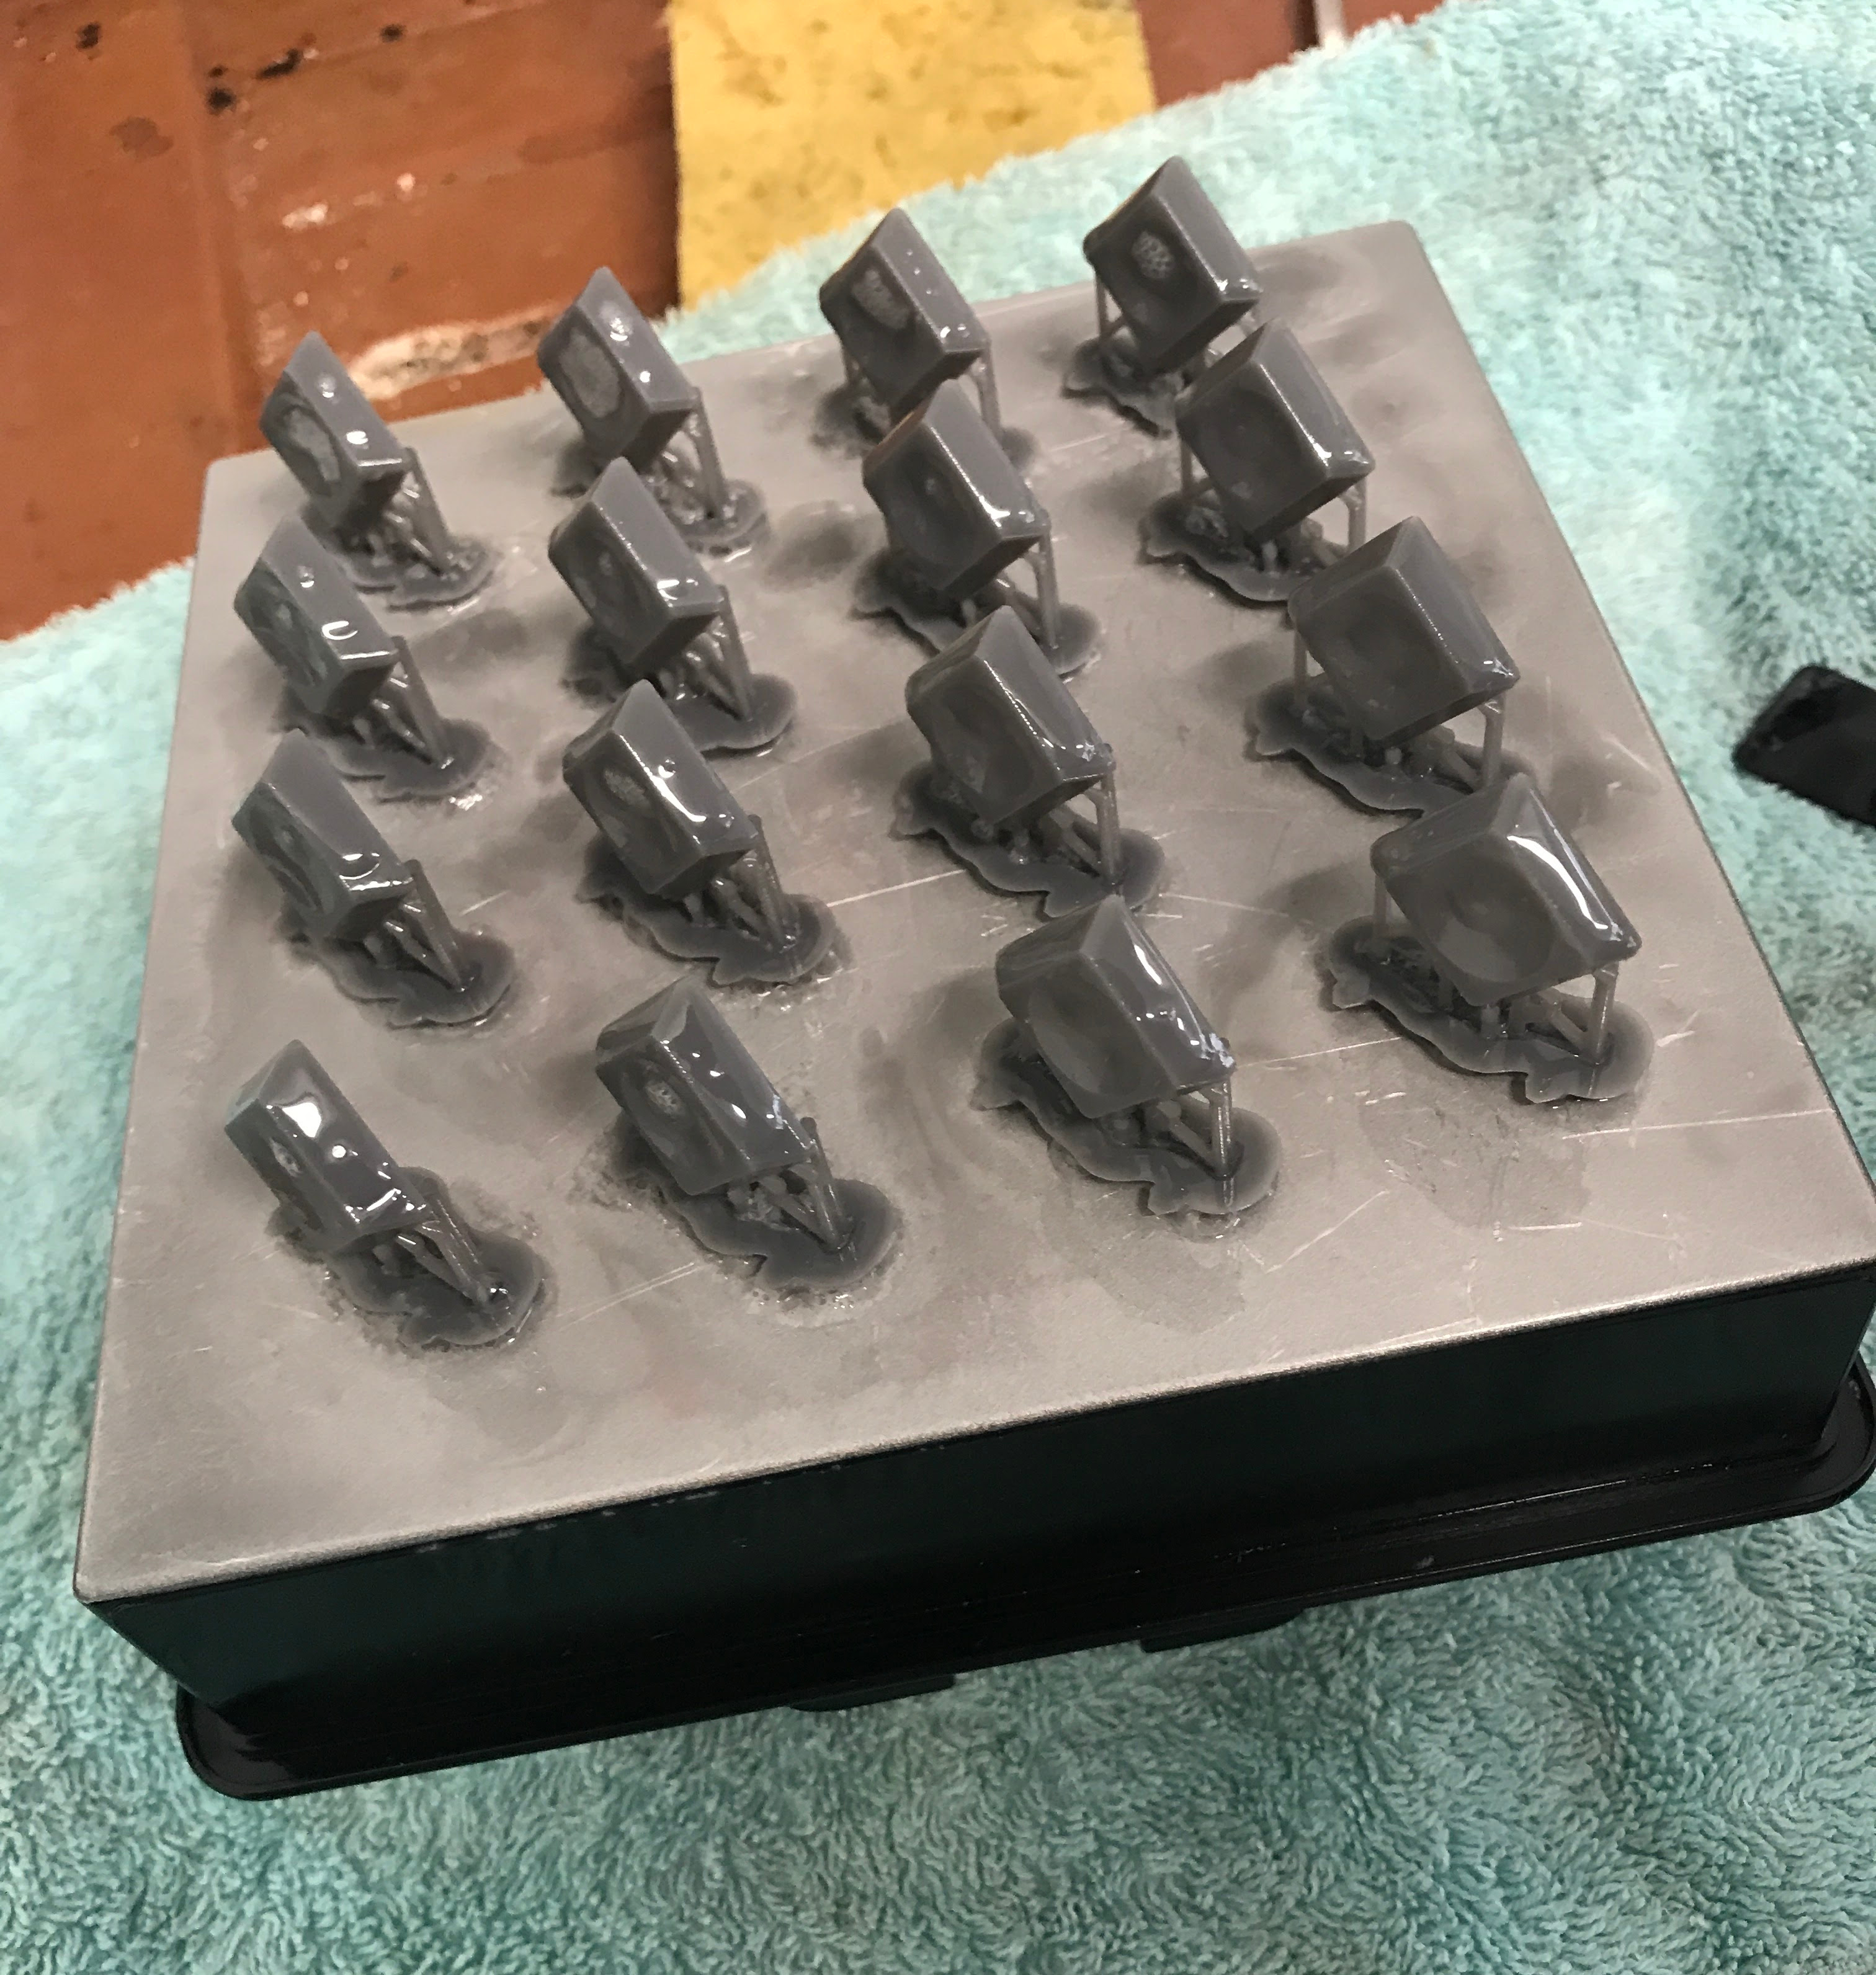
Because our layout was custom and injection molding is too expensive for small hardware projects, Ana suggested printing our keycaps in a Formlabs Form 2 SLA resin printer. This approach resulted in surprisingly pleasant-to-touch, slim caps for the MLs that we could easily customize. A proper wire mechanism to stabilize the space bar and other long keys is still on the to-do list, but the keyboard already works well enough for first application testing.
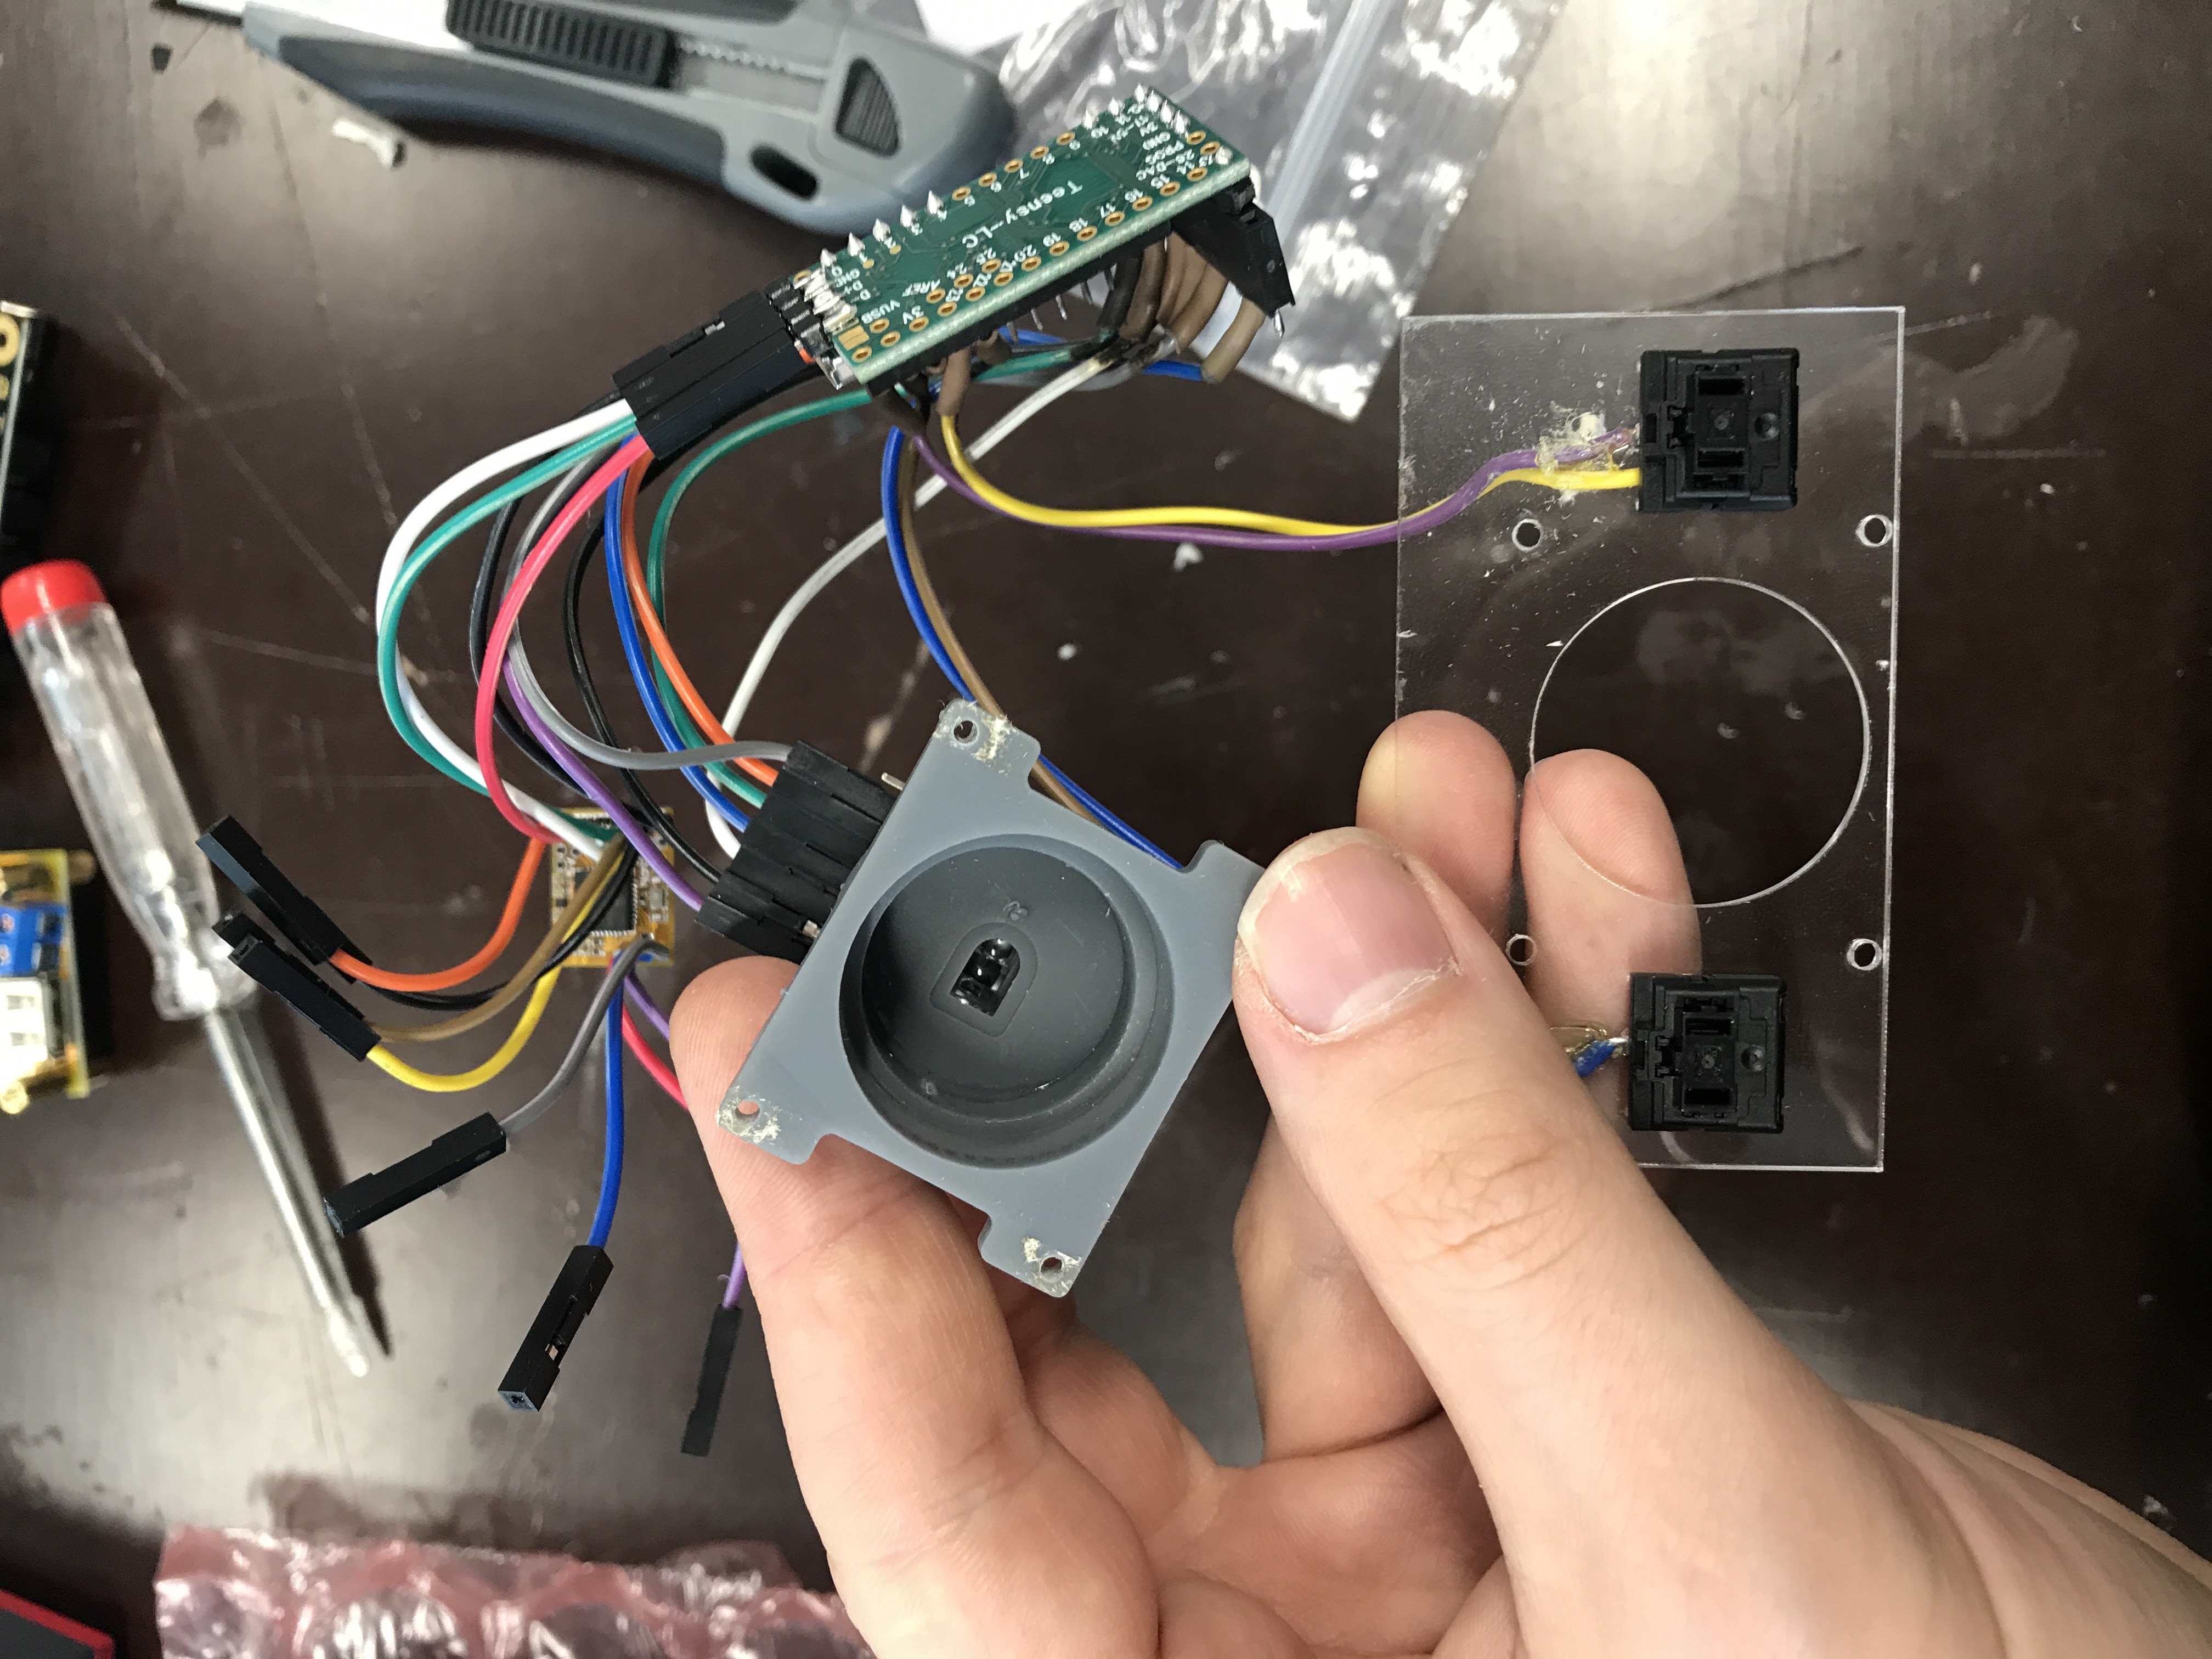
Ana also used the Form 2 for printing a custom designed housing for the PWM3360 motion sensor that would form the base of our trackball module. The ball itself is a standard acrylic sphere from Modulor, and the left and right buttons are Cherry ML as well.
Both the Keyboard and the pointing device are driven by Teensy LC Cortex M0+ boards that speak USB HID. To connect these internally to the SoC, I chose the incredibly small USB NanoHub board by Muxtronics.
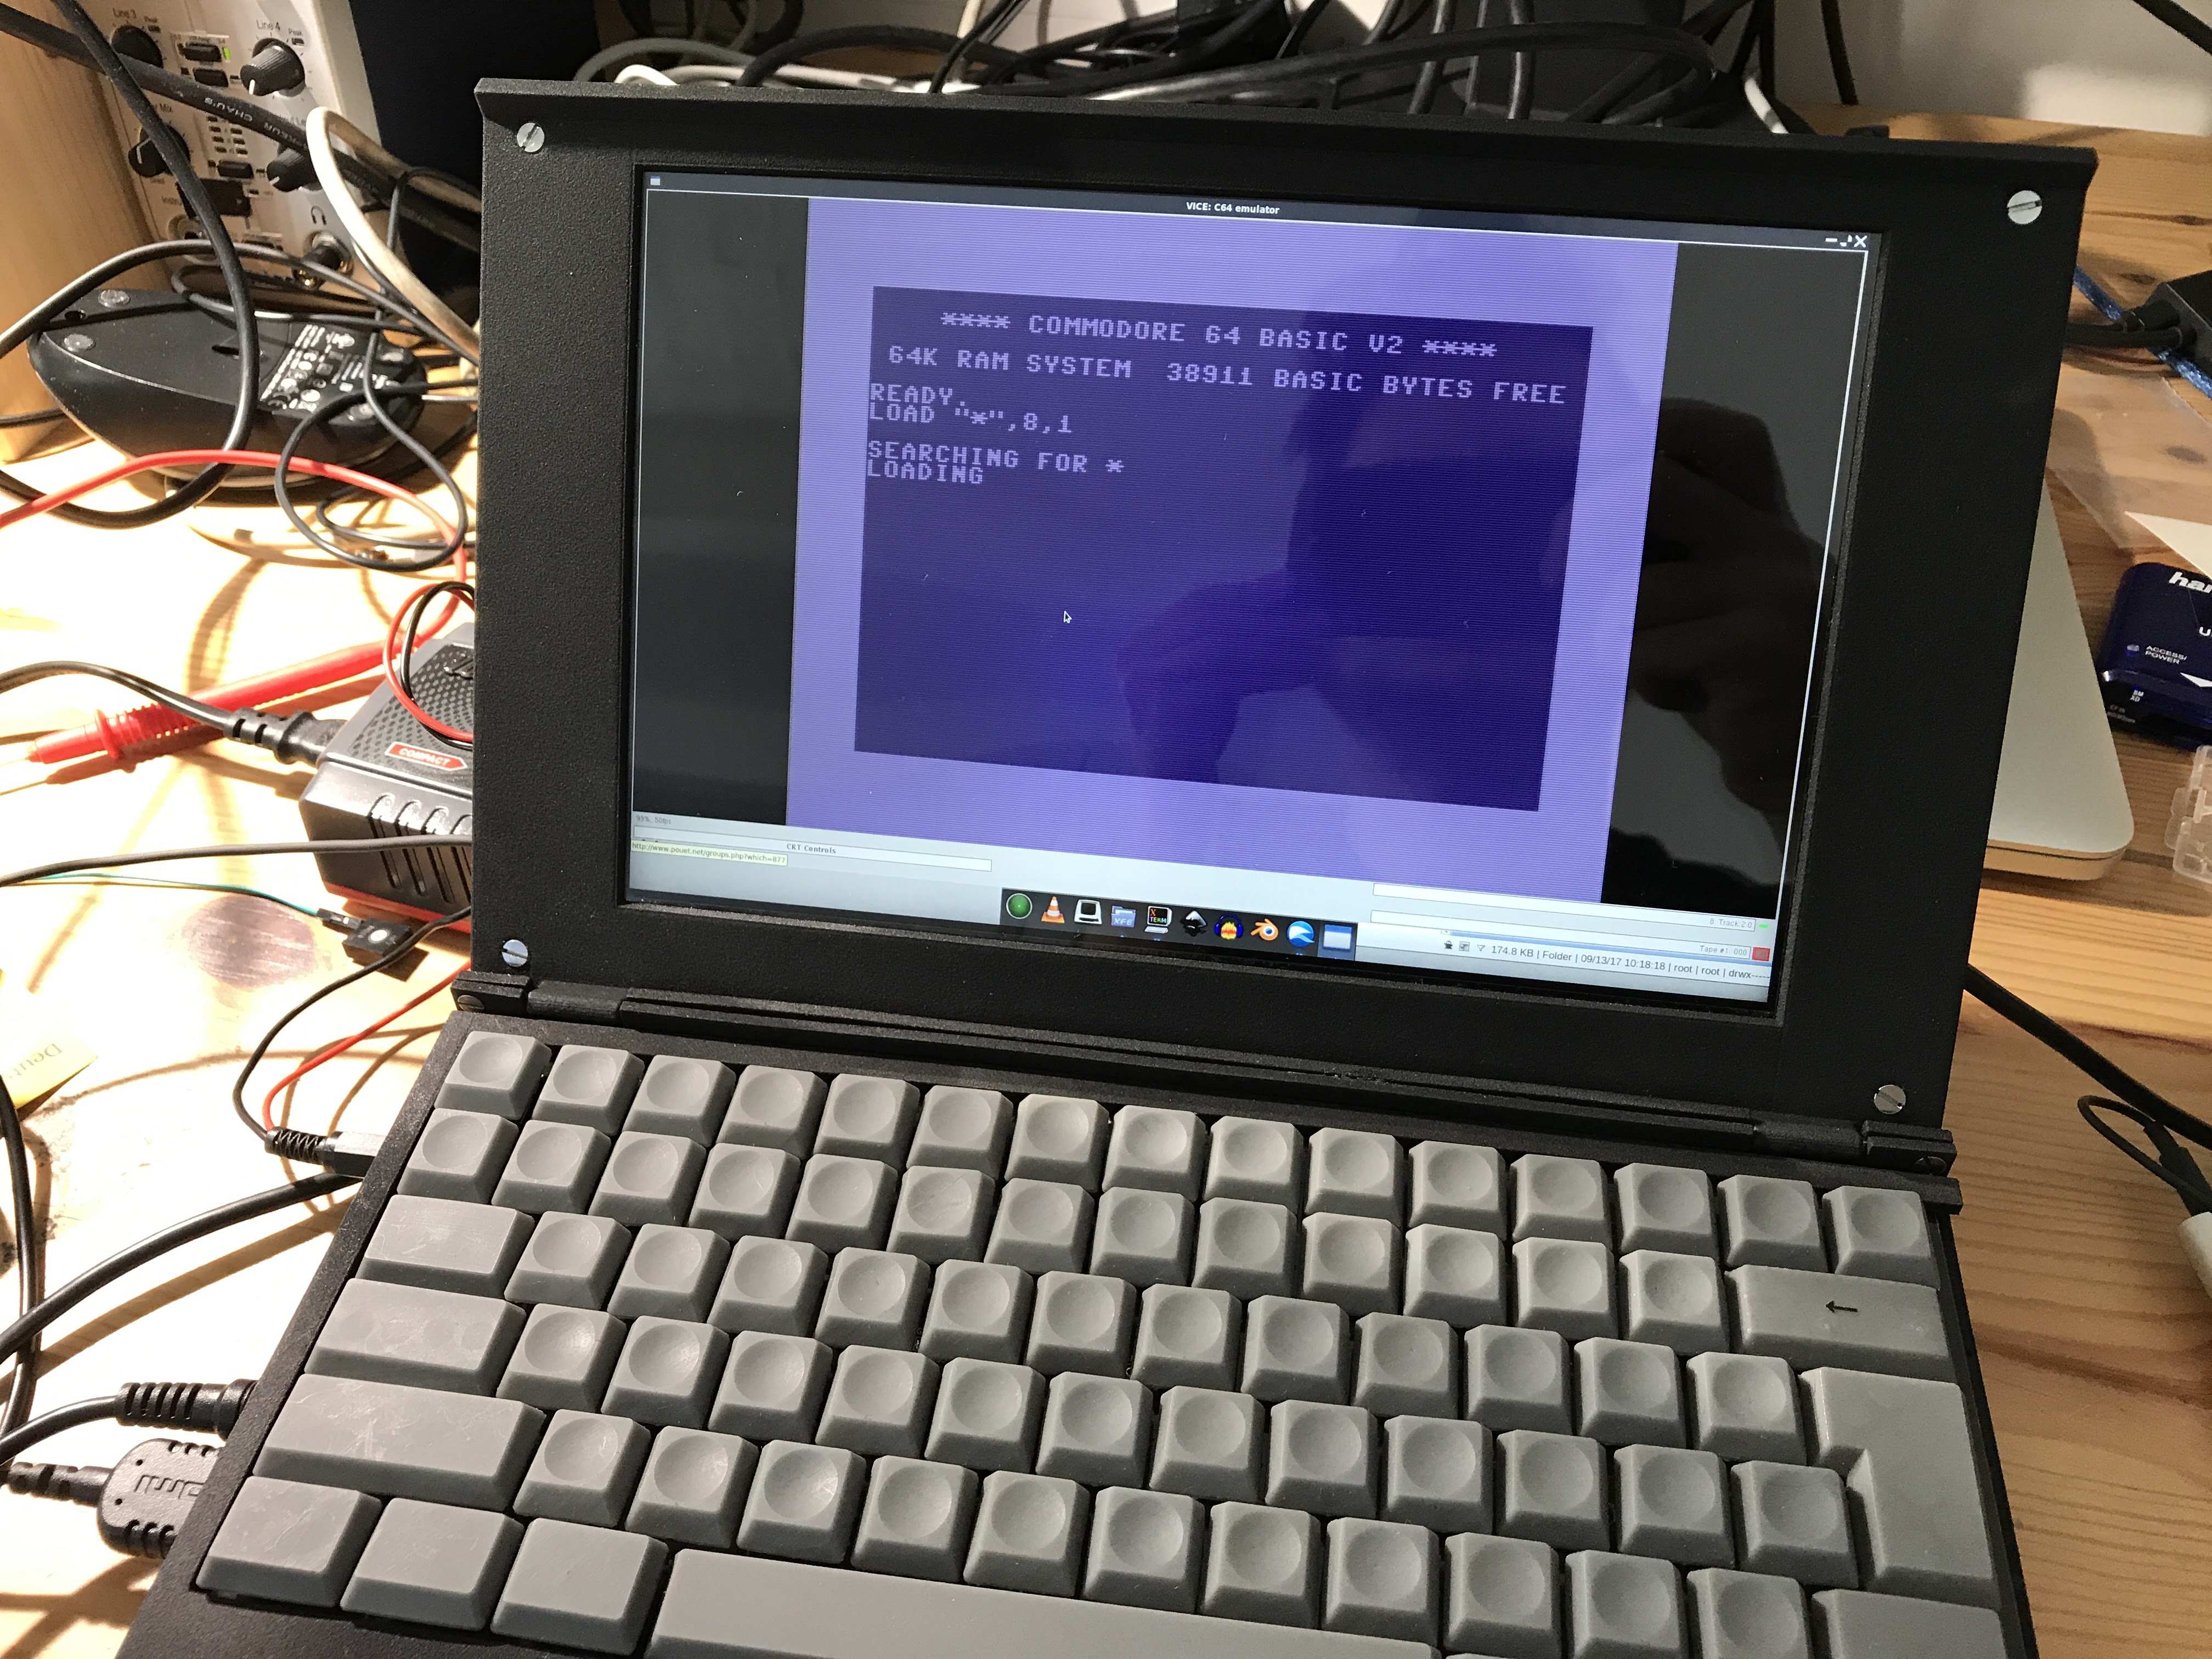
For the first display protoype, I compromised and chose a 10" 1920x1200 panel with a corresponding HDMI to dual LVDS adapter by Chalkboard. I felt that although this approach requires a little dangling HDMI cable on the outside of the prototype, it would save considerable development time to quicker reach a functioning system for further user testing. In the next iteration, this cable will be eliminated.
For printing the chassis, encompassing the main box and the display assembly, we chose to go with Shapeways with good results, although at a later stage these might be candidates for resin casting or CNC milling, or other technologies that are available to a user that wants to customize the housing.
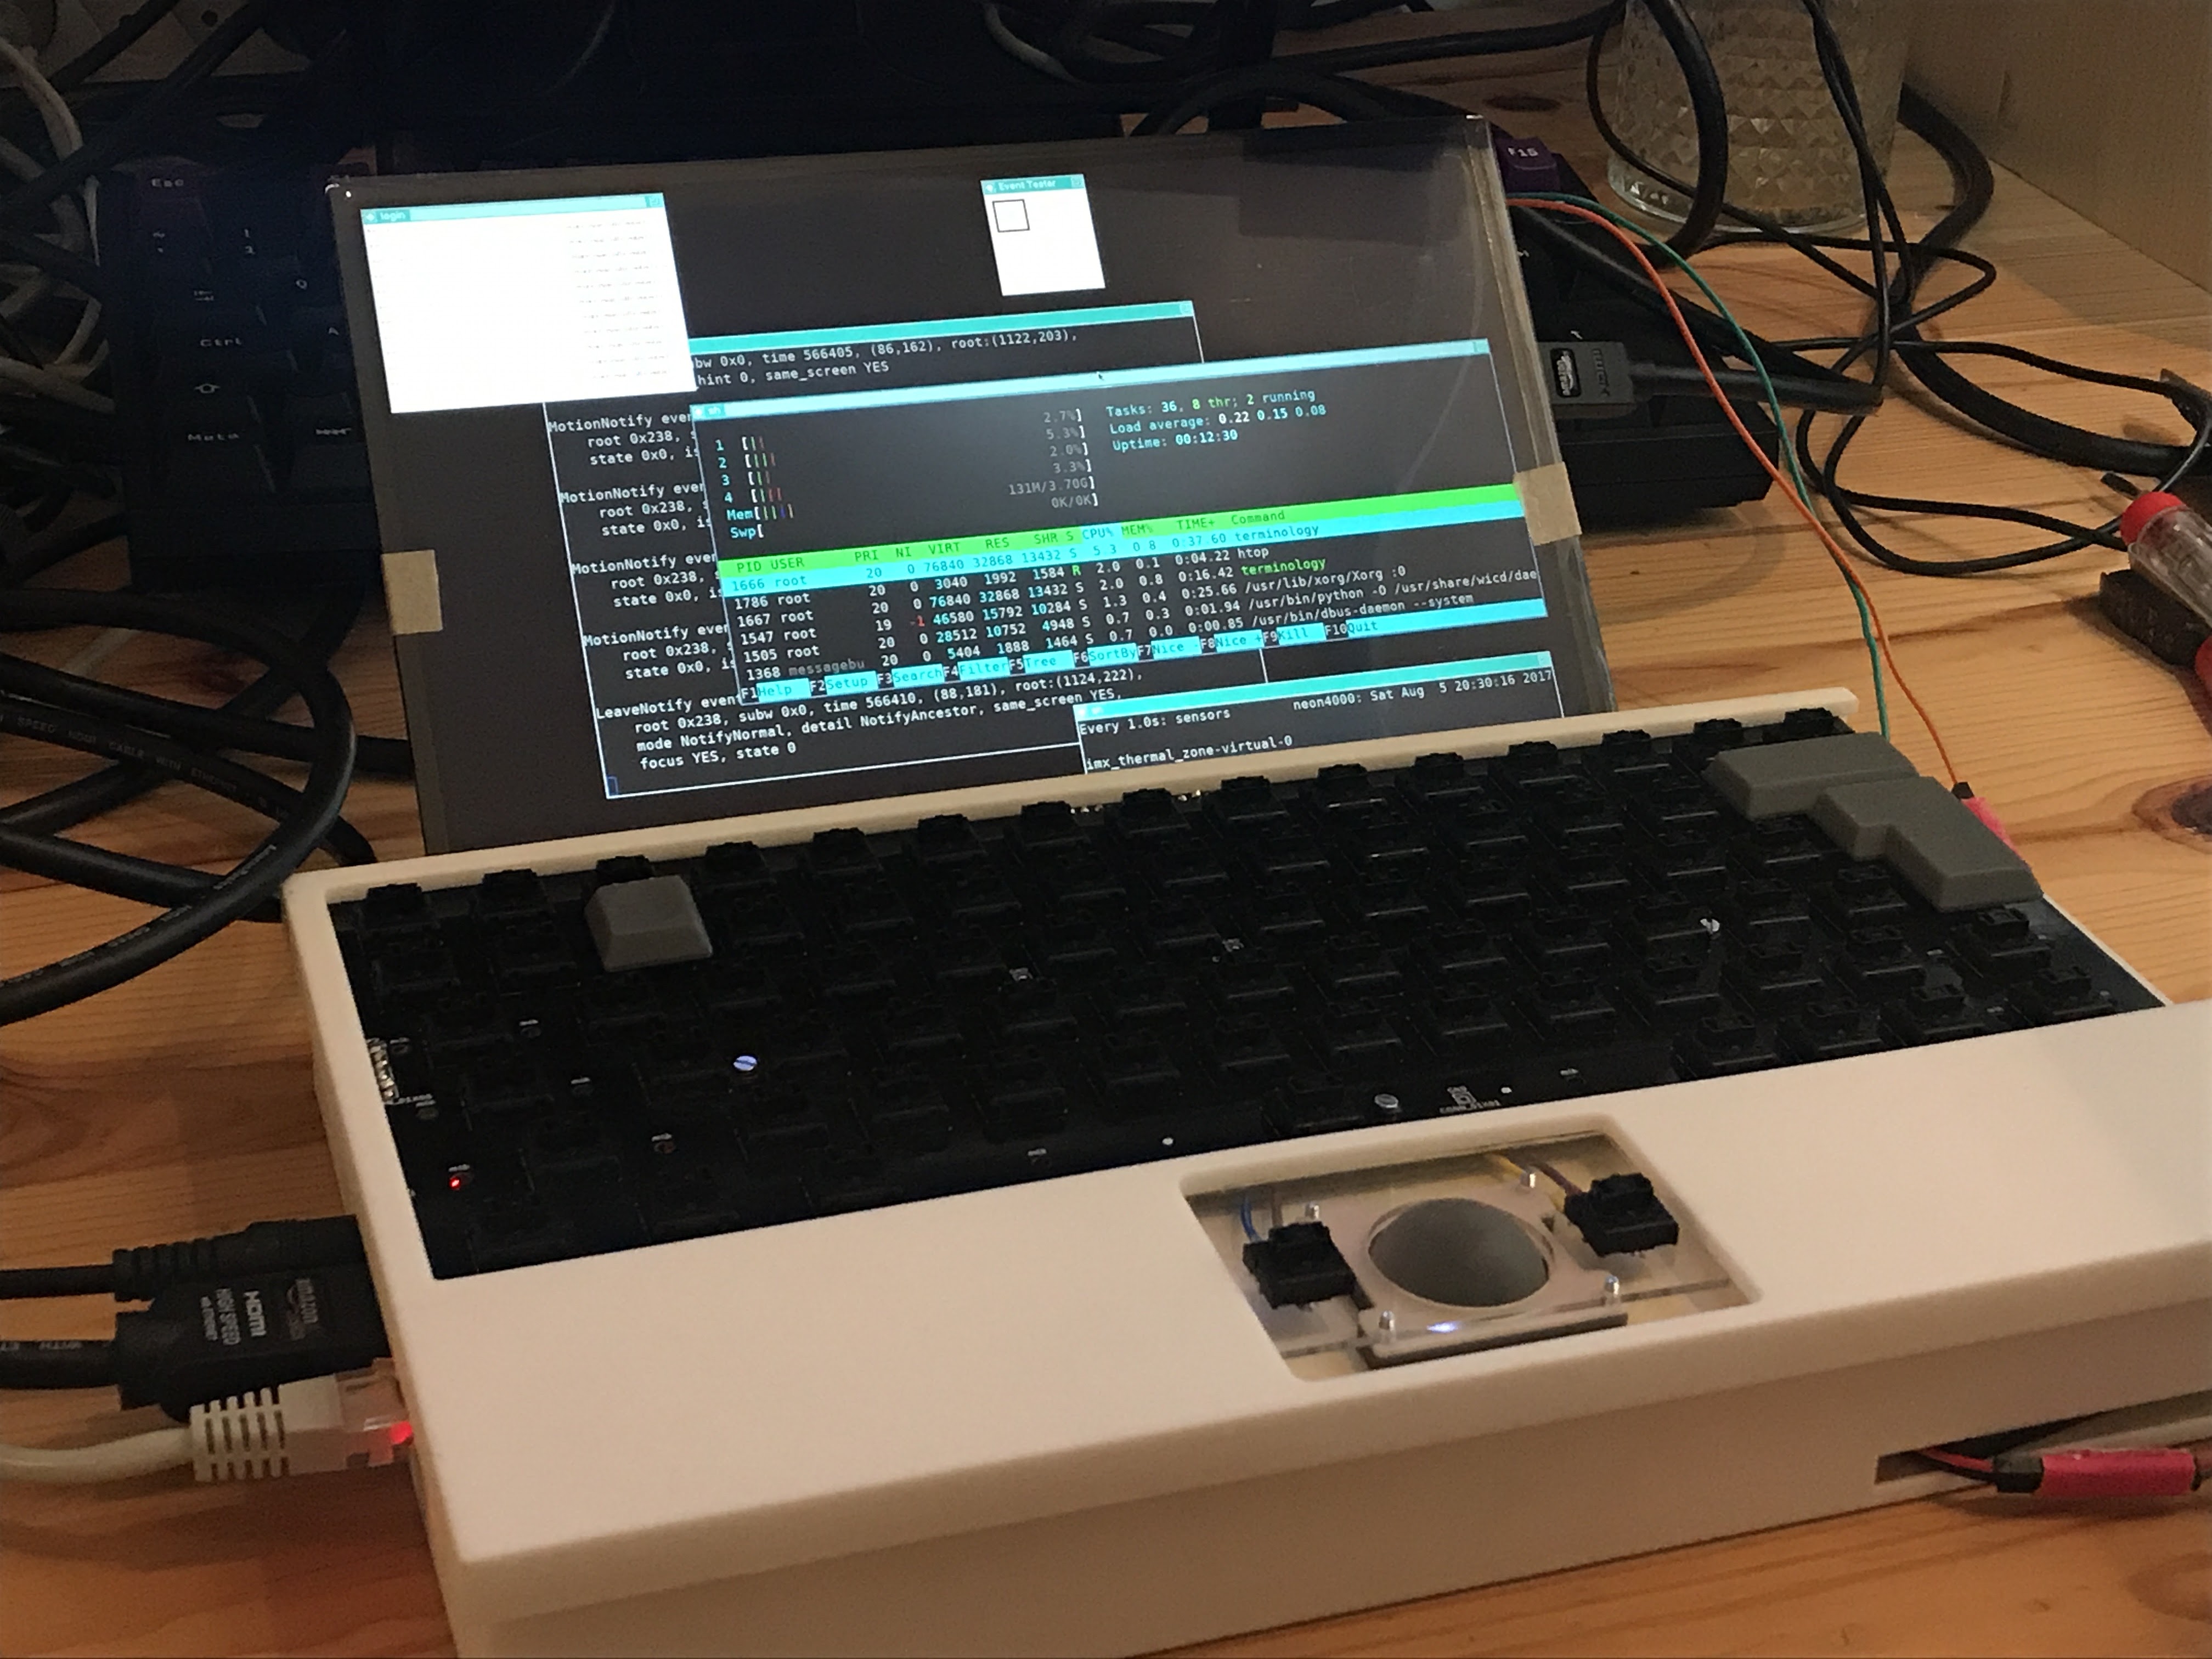
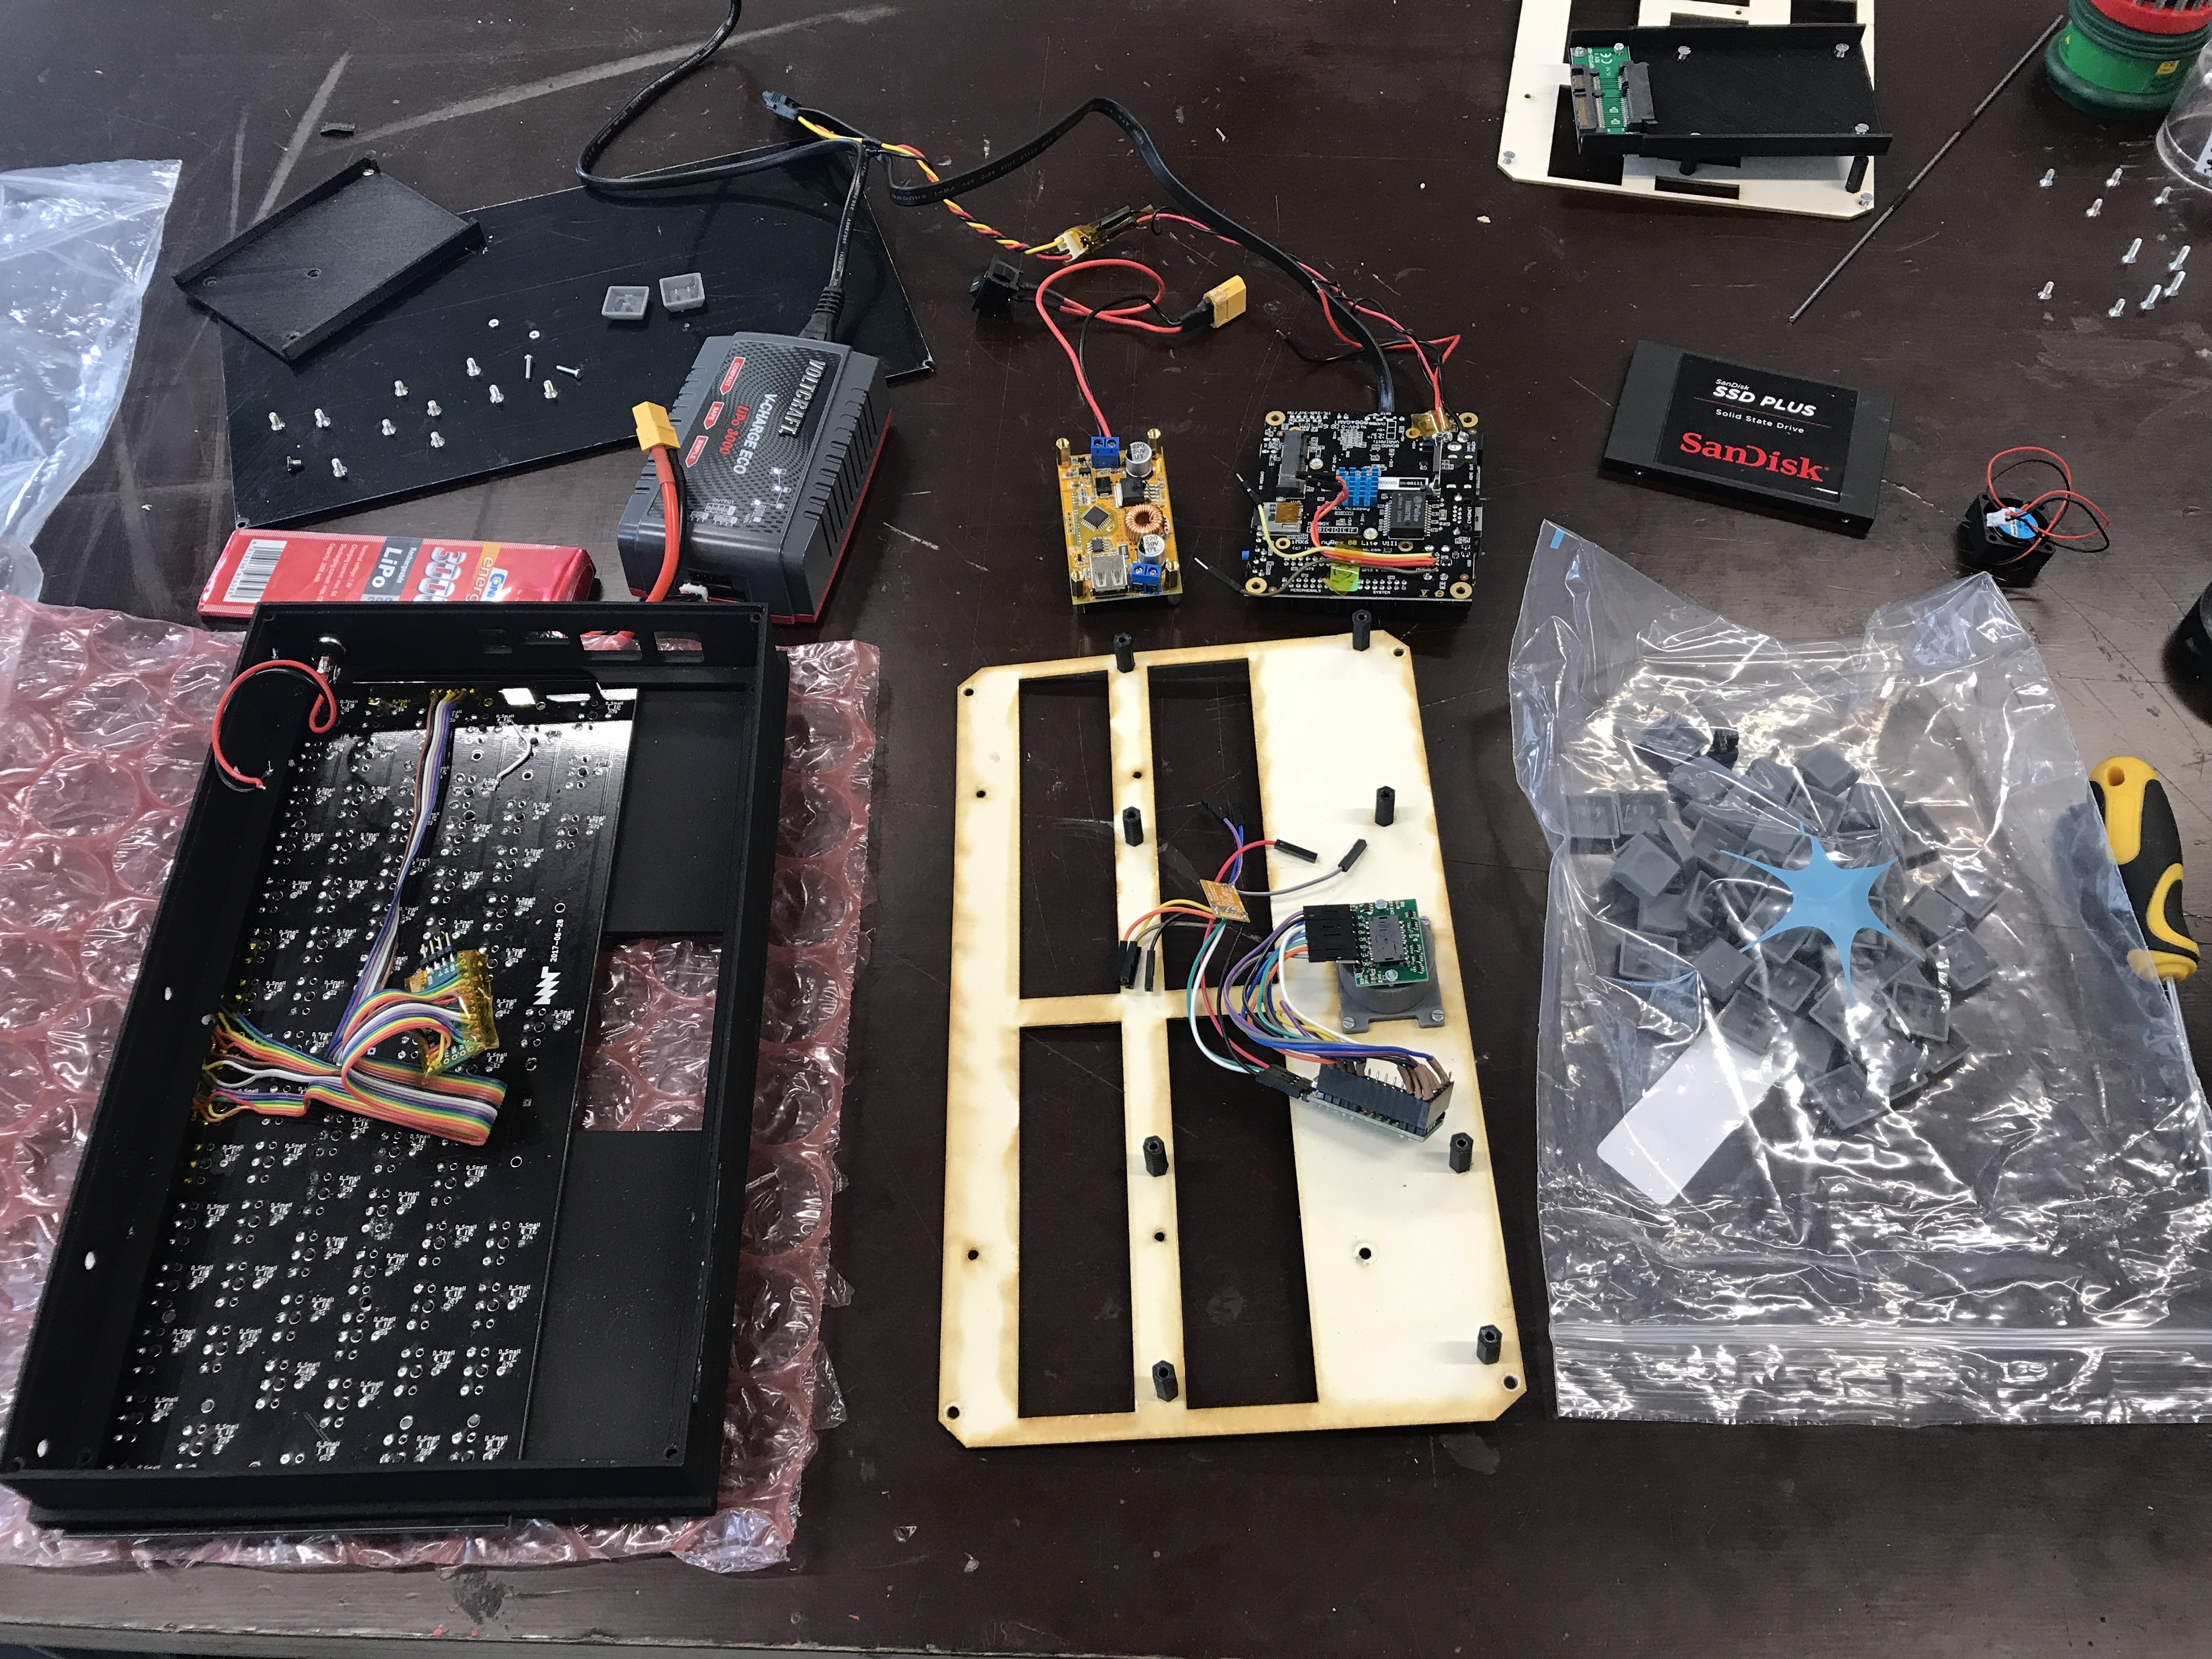
After around 8 weeks of working on all the pieces, we met in FabLab Berlin to assemble the first working system over an intense course of around 5 hours. Many little things went wrong — from wrongly placed holes to bad solder joints to pieces of 3D printed material breaking off — but because we were surrounded by all necessary production equipment and Ana's never ending supply of improvising techniques, we made it happen and our DIY laptop booted for the first time.
The first protoype of Reform is quite a brick. While it is only 28cm wide and 17.5cm deep, its complete height including the display adds up to 5.5cm to accomodate for all the connectors of the development board and to allow room for experimentation before shrinking everything down. Its 1.5kg including the battery feel OK, though. The battery is an off-the-shelf RC 7.4V LiPo battery with modest 3000 mAh capacity. Running a full linux desktop on full LCD brightness clocks in at around 1.8A, 5V, which yields 2.5 hours of continuous usage on this battery. Doubling that number would be a good target.
I succesfully tested software packages like LibreOffice, Blender, GIMP, Inkscape and Audacity on the laptop. I managed to run Quake 3 Arena using the GPU, but I had to manipulate the OpenGL version number, which leads to some glitches that should be fixed. It can also play H.264 movies with mplayer and surf the web with QupZilla or Chromium (JavaScript heavy websites drive up the core temperature, though). Because they are connected and flashable internally via USB, you can even update the keyboard and trackball firmware using the Arduino tools.

All in all, although it has a number of rough edges, we're very happy with how this first prototype turned out. Of course we want to make it better, thinner, get rid of external cables, publish schematics and documentation and set up an online shop where you can order DIY kits or single parts. And with the 3D files, you will be able to print chassis parts in any color or modified shape you want. We want to encourage experimentation and tinkering, and bring back some hacking fun to mobile personal computing.
Fedevel and Voipac, the Designers/Manufacturers of TinyRex, agreed to help with the production SoC/SOM and Voipac offered an upgrade path to the next generation i.MX8 SoC that will be launched in the coming 3-6 months. My job will be to design a slimmed-down base board, an integrated charger/power brick and work with Ana on making the interconnect between chassis, display and input devices clean and easy. Ultimately, we will launch a crowdfunding or pre-order campaign. The latter worked well to make my previous hardware project, the VA2000 Amiga FPGA Graphics Card a reality.
At this point, we're eager to hear your early feedback about Reform. What would you like to see in an open, portable computer system? What did we miss? Send your thoughts to lukas@mntmn.com.
Or subscribe to the Reform newsletter and we will update you on further progress of the project.


